Posts

Showing posts with the label arduino

Getting started with the Raspberry Pi pico
Image
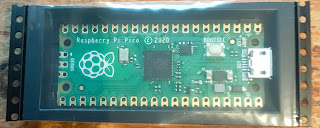
I'm always excited when Eben Upton pulls another Raspberry Pi rabbit out of his capacious topper. Last week he announced the $4  Raspberry Pi pico . It's a unique product for several reasons, and I put an order in as soon as I saw the announcement. It's easy to get the pico going The pico's on-line documentation is superb and it's supplemented by an excellent and inexpensive book from Gareth Halfacree and Ben Everard. I did hit one minor 'gotcha'. I've been working on my main workstation which runs Linux Mint, and discovered the hard way that the Thonny Editor won't install properly if you're using Python 3.5 Python 3.5 has reached end-of-life, but it's still the default on Linux Mint 18.3. If I want to use a later version I have to set up a virtual environment. Once I did that, Thonny installed perfectly and within a couple of minutes I'd created a Hello World script and run it on the pico. If you're using a Raspberry Pi to program ...

Fault-finding breadboarded circuits - a tale from the trenches

Image
blobstar Yesterday I destroyed an Atmel ATMega328 chip. (That's the chip at the heart of the Arduino.) The Atmel chips are very well designed, and it's really hard to damage them, but I've managed it twice in the last decade. Yesterday's episode was due to a mistake in wiring up an Arduino clone that I've been building on a breadboard. The clone is a descendant of Cefn Hoyle's excellent Shrimp design. I decided to build an alternative version which could be programmed using an FTDI cable and made permanent using an Adafruit perma-proto board. The correct layout (shown above) is easy to follow, but my ageing eyes led me to connect two of the power wires to the wrong pins. When I powered up the board using an FTDI cable the LED didn't blink and I knew something was wrong. But what? A simple approach to problem-solving When something stops working, you focus on what's changed. When ...

Build your own Arduino clone - updating the Shrimp

Image
A Shrimp assembled A while ago I ran a series of workshops showing how to build your own Arduino clone, based on a low-cost e-book called Making the Shrimp.   The book needs an update and I'm looking for reviewers. They will get a free copy of the book and a free kit to build. If you're interested, sign up here .

The micro:bit is talking to the VL53L0X ToF sensors!

Image
This chip is no more :( This morning I got my Arduino sensor driver talking to a micro:bit using SPI. The Arduino Uno runs at 5 volts, and the micro:bit works at 3v3, so I used a level shifter to connect the two. My first attempt failed disastrously. The level shifter I used was based on the TI TXB0108. I managed to connect the 5v power and inputs to the 3v3 side, and I fear the magic smoke has left the chip. It's a shame, as the board was my first attempt at soldering SMD devices. It's been sitting unused in my bits box for a few years, though, so it's not the end of the world. Fortunately I had an Adafruit level shifter breakout based on the same IC. It's well laid out with very clear pin markings and I managed to connect it correctly. The replacement worked perfectly and the micro:bit MicroPython code was very straightforward. I've listed it below, and it's with the other code on GitHub . from microbit import * import struct from time imp...

SPI access to multiple ToF sensors is working

Image
I've been ploughing through the steps towards my goal of connecting multiple distance sensors to Anastasia's micro:bit. I now have a pair of Arduinos connected via SPI, with the slave reporting distances from two VL53L0X sensors. The wiring is a mess and the code needs cleaning up. But it's working, and replacing the Arduino master by a micro:bit should be pretty straightforward. I'll report on progress. The code is on GitHub .

An I2C keypad for the micro:bit - part 2

Image
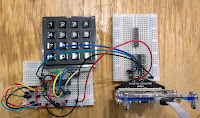
A working prototype I've now got a home-brew Arduino clone reading the keyboard and sending key-presses to a micro:bit using I2C. Preparing the Arduino clone was trickier than usual. As I mentioned in yesterday's post , the Arduino needs to run at 3.3 volts. That's the working voltage (V cc ) for the micro:bit, the Pi and the Jetson Nano. Connecting I2C lines from a 5v device would damage them, so 3.3 v operation is essential. I have a good stock of ATmega328P chips left over from the days when I was running Shrimping workshops. The ATmega328P  works well at 3.3 volts, so long as the clock frequency is no more than 8 MHz . Most Arduinos run at 5v with a clock speed of 16 MHz, so there's work to do.   8 MHz clock issues If I2C is to work reliably at 8 MHz the Arduino needs to be configured for an 8 MHz clock, and it needs a bootloader that works at that clock rate. My first step was to wire up a working clone on a breadboard with an 8 MHz crystal and i...

Use websockets to build a browser-based Digital Voltmeter

Image
This is the third and final part of a series about building a browser-based six-channel Digital Voltmeter (DVM) using an Arduino and a Raspberry Pi. Part one covered the software on the Arduino and the USB connection to the Raspberry Pi. Part two showed you how to use the pyserial package to read that data into a Python program and print the results as they arrived. In this final part you'll see how to use Joe Walnes ' brilliantly simple websocketd . You'll see how you can turn the Python program into a server without writing any additional code! Finally, you'll view a web-page that displays the voltages in more or less real-time. Web sockets with websocketd HTTP makes it easy for a web browser to ask for data from a web server. That approach is known as client pull because the client (the web browser) pulls (requests) the data from the server. For the DVM application you want to use server push; in other words, you want to send changes in the voltages...

Using pyserial on a Raspberry Pi to read Arduino output - WebDVM part 2

Image
This series describes how to build a simple web-based DVM (digital volt meter) that can display up to six voltages in a web browser. It's a really useful hack if you need to measure several voltages at once. In part 1 you saw how to send analog voltage data over a serial link to a Raspberry Pi. For testing purposes you displayed the data in a terminal window on the Pi. In this part you will use read that data using Python on the Pi and print the data to standard output. In the next part you'll turn your Python script into a dynamic application that displays the 6 voltages in a browser, updating the web page as the values change. The code ( available on github ) uses the pyserial package. It's a simple approach, but there are a few issues to find your way around. You'll see the problems and solutions below. Pyserial pyserial is a Python package that allows Python programs to read and write data using serial ports. You can install it via pip. pip3 ins...

Build a Web-based DVM using Arduino and Pi zero W

Image
This three-part series show you how to build build a Web-based 6-channel DVM (digital voltmeter)  using an Arduino and Raspberry Pi zero. If you’re experienced and impatient you will find software and basic installation instructions on GitHub. If you’re less experienced, don’t worry. All you need to know is: how to compile and download an Arduino sketch, how to connect your Raspberry Pi to your network, and how to open a terminal session on the Pi. The project is fun, useful, and simple. You probably have the parts already, in which case the whole project will take about an hour to program and connect. You don’t need to solder anything. The WebDVM uses some general techniques that you can apply to projects of your own In Part 1 (this post)  you will install some simple Arduino code, connect the Arduino to a Pi, and check that the two are communicating. In Part 2 you’ll use a short Python program on the Pi to read the Arduino’s output. In Part 3 you'll use a...

Five steps to connect Jetson Nano and Arduino

Image
Yesterday's post showed how to link a micro:bit to the Jetson Nano. One of the members of the (unofficial) NVIDIA Jetson Nano group on Facebook asked about connecting an Arduino to the Jetson. Here's a simple recipe for getting data from the Arduino to the Jetson Nano. It should work on all the Jetson models, not just the Nano, but I only have Nanos to hand. On request, I've added a recipe at the end of this post which sends data from the Jetson Nano to the Arduino; it turns the default LED on the Arduino on or off. The recipe for sending data from the Arduino to the Jetson has just 5 stages: Program the Arduino. (I used the ASCIITable example). Connect the Arduino to the Jetson using a USB connector Install pyserial on the Jetson Download a three-line Python script Run the script.   Programming the Arduino I used an Arduino Uno, and checked it on a verteran Duemilanove (above), but any Arduino should work. You'll need to do this step usi...

Raspberry Pi and Pints at Potton

I'm off to Potton tomorrow for a Pint or two at the Rising Sun with fellow Raspberry Pint enthusiasts. These informal sessions are run by Mike Horn and Tim Richardson, who also organise the excellent CamJams. If Pi and Pints appeal, there are still a few tickets available on Eventbrite . The event is free, and the tickets are there to make sure the room at the pub doesn’t get overcrowded. A gardening project I'll be taking along a project for my wife's greenhouse. It involves linking a Pi at home to a XinoRF in the greenhouse at her allotment using wireless radio. The Pi uses wireless things ' Slice of Radio. The XinoRF (also from wireless things ) is a wireless-enabled Arduino clone. The basic set-up now works well, but getting it going has been trickier than I expected. I'll be describing the mistake I made and its simple solution in next week's edition of my free newsletter, along with additional details of the software at each end. You can subsc...

Using the Raspberry Pi SPI as an AVR ISP (In-system programmer)

Image
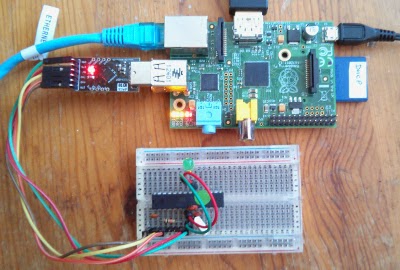
A few days ago I blogged about using the Arduino IDE on the Raspberry Pi . It works fine, but of course the Arduino or clone needs to have a boot-loader installed in order for the IDE to work its magic. I wondered if you could also use a Pi to install the boot-loader in the first place. There are lots of ways to install a boot-loader, but most of them require that you start out with at least one working Arduino or clone. What if you don't have one? Could you use a Pi as a programmer? (c) Jason Mann I'd recently seen a rather cool project which uses a custom board with an ATTiny AVR chip and an LED display to show the Pi's IP address. Jason Mann, the author, explained how he used the Pi to program the ATTiny. It looked to me as if his technique should work just as well on an ATMega 328p. (That's the chip that forms the heart of the Arduino Uno and the Shrimp). It does. I hit some minor complications while getting things to work and thought I should shar...

Arduino e-Book - reviewers wanted. Might you be one?

Image
. I’m about to publish an e-Book for Arduino Experimenters It’s called Life after Blink! I’m looking for a small team of reviewers who can check it over for bugs and suggest improvements. Might you be interested? The book describes 5 experiments: Fortune Cookie server Morse flasher Counter/LED ripple display Button and Buzzer LDR (photocell)  and bar level indicator The experiments use readily available components, but there is a kit of parts available for those who prefer. If you are selected as a reviewer you will get a free copy of the kit , and you will get a free copy of the e-book with updates throughout its lifetime. If you think you might enjoy reviewing Life after Blink, click here to register your interest . I’ll send you a link to a short online survey. There’s no obligation, I won’t spam you, and you’ll get 75% off the price of the book even if you don’t review it. Register your interest now !

What would you like to know about Pi + Arduino?

Image
C3Pi Regular readers will know how much I like the combination of the Raspberry Pi and Arduino. C3Pi is a prime example of that approach. There's lots to say about using the two platforms together. I just started a poll on G+ asking which aspects people are most curious about. Have your say here !

Covent Garden Workshop

Image
The date for the next Covent Garden Jam has been confirmed - it's on  25 April 2015 from 14:00 to 17:00 (BST) and tickets will be released soon. You can see more details here , though you can't book tickets yet. There will be lots of fun things to do. I'll be running two workshops - Making the Shrimp and tworse . Making the Shrimp Build your own Arduino Clone! You'll need to pay for your kit (£10) and then follow the step-by-step instructions in the workshop guide. It's fun, it's easy (no soldering) and it's fast. The workshop takes 90 minutes or less. You'll need a laptop with a spare USB port and version 1.0.x of the Arduino IDE installed - or you can use a Raspberry Pi! You can read about past workshops here and here . Tworse Link up a Raspberry Pi to An Arduino (or Shrimp), and program them to flash out Tweets in Morse Code! It's a chance to polish your Python and sketch-writing skills! You can read a bit about the tworse ...

Making Shrimp (Arduino) projects permanent with Stripboard

Image
Making the Shrimp is a great way to get started with Arduino technology. The Shrimp is a low-cost Arduino clone on a breadboard. Once you've prototyped a Shrimp-based project you'll probably want to make a more permanent version, and stripboard is a great way to do that. The Shrimping It! website offers a low-cost stripboard kit and has a few pictures to get you started, but I suspect some beginners would like some more detail. I'm about to make a simple prototype for a new project I'm working on and I thought it would be worth while documenting the process. This is not a soldering guide: if you need one, the Shrimping site recommends this . Kit contents The stripboard kit contains three items: a generously sized stripboard, a strip of headers, and a DIL socket. You'll need the contents of a standard Shrimp kit as well. You'll also need some tools. I used a soldering iron a small fume filter a pair of wire cutters a polisher to clean the ...

Arduino IDE on the Rapsberry Pi

Image
As part of my experiments with tworse (the Twitter to Morse project) I needed to install the Arduino IDE on a Raspberry Pi and use it to upload a sketch to a Shrimp. The Shrimp is a low-cost Arduino clone which uses a CP2102 as its programmer. To my surprise and delight everything just worked out of the box. A couple of people have asked me what I did. Here's what: Installing the IDE sudo apt-get update sudo apt-get upgrade sudo apt-get install arduino Since I normally work at the command line, I needed to fire up X-windows startx The menu included a category electronics, and the Arduino IDE was located there. Uploading a sketch Shrimp and Pi I started up the IDE with the Shrimp plugged into a USB port. I configured the IDE to use the appropriate board type (normally Arduino UNO for a Shrimp) and selected /dev/ttyUSB0 as the port. I opened and uploaded the examples/blink sketch. The IDE compiled it (which took about a minute) and uploaded it successfully...