Pages

Monday, 11 February 2019

A concise solution to a fiddly coding problem
I
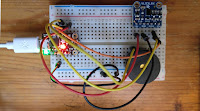
My pomodoro timer is coming on nicely. I'll post about progress in the next day or so.

For now, here is a short story about a problem I hit while working on the project, and the happy solution that I came up with.

For some time I've kept an online journal for each project I'm working on. Like some blogs, the journals used to have the latest entries at the top.

Here's a sample journal file:

# Project journal for zero-web
 

## Thursday 07 February 2019
 
I added 2 new pages.

## Monday 04 February 2019

I've created a homepage.
I'll serve it with websocketd.
I found that order confusing.

I decided that I'd prefer the posts ordered as they would be in a paper diary, with the latest posts last. That way I could read the  project history like a book.

The problem: I have a lot of project journals, and I really didn't want to edit them all by hand.

I decided to write a program to do it.

The problem was simple to solve using APL. Regular readers will know that APL is one of my favourite tools for data manipulation and analysis. APL is an array-oriented functional language with a huge range of primitive functions and operators, and APL programs tend to be very concise.

APL uses lots of special character, along with a lot of the arithmetic symbols you learned at school, so I'll explain what the program does step by step.

If this spikes your curiosity there's a link to help you find out more about APL at the end of this post.

I already had a tiny APL function called read which reads a file as a vector of character vectors. The result is a little hard to parse visually so I've used a function called show to display the vector in column format.

Here's the first step:

     show read 'journal.md'

┌──────────────────────────────┐
│# Project journal for zero-web│
├──────────────────────────────┤
│                              │
├──────────────────────────────┤
│## Thursday 07 February 2019  │
├──────────────────────────────┤
│                              │
├──────────────────────────────┤
│I added 2 new pages.          │
├──────────────────────────────┤
│                              │
├──────────────────────────────┤
│## Monday 04 February 2019    │
├──────────────────────────────┤
│                              │
├──────────────────────────────┤
│I've created a homepage.      │
├──────────────────────────────┤
│I'll serve it with websocketd.│
└──────────────────────────────┘ 

Next I found out which lines correspond to the beginning of a post; they start with ## followed by a space.

     mask ← '## '∘≡¨3↑¨file
     mask
0 0 1 0 0 0 1 0 0 0

The 3↑¨ reads 'three take each'; it takes the first three characters of each line of the file. The '∘≡¨ checks to see if the start of each line matches the string '## '. The result is mask - a vector of boolean values that told me which lines in the file were the starts of dated journal entries.

That's almost what I wanted for the next step. I snipped the file into segments which correspond to posts but I wanted to keep the first bit of the file as well. In other words, I wanted the first element of the mask to be a 1, not a zero. I achieved that by dropping the first element and then sticking a one on the front.

In APL that was easy:

      mask ← 1, 1↓mask
      mask
1 0 1 0 0 0 1 0 0 0


Now I needed to chop the contents of the file into posts so I could modify their order. I used an APL function called partitioned enclose to do just that.

Here's the code and its result:

      show posts ← mask ⊂ file
┌─────────────────────────────────────────────────────────────────────────────────────┐
│┌──────────────────────────────┬┐                                                    │
││# Project journal for zero-web││                                                    │
│└──────────────────────────────┴┘                                                    │
├─────────────────────────────────────────────────────────────────────────────────────┤
│┌────────────────────────────┬┬────────────────────┬┐                                │
││## Thursday 07 February 2019││I added 2 new pages.││                                │
│└────────────────────────────┴┴────────────────────┴┘                                │
├─────────────────────────────────────────────────────────────────────────────────────┤
│┌──────────────────────────┬┬────────────────────────┬──────────────────────────────┐│
││## Monday 04 February 2019││I've created a homepage.│I'll serve it with websocketd.││
│└──────────────────────────┴┴────────────────────────┴──────────────────────────────┘│
└─────────────────────────────────────────────────────────────────────────────────────┘

Now I wanted to take the first snippet, and stick it in front of the remaining snippets in reverse order:

      show reordered ← (1↑posts),⌽1↓posts
┌─────────────────────────────────────────────────────────────────────────────────────┐
│┌──────────────────────────────┬┐                                                    │
││# Project journal for zero-web││                                                    │
│└──────────────────────────────┴┘                                                    │
├─────────────────────────────────────────────────────────────────────────────────────┤
│┌──────────────────────────┬┬────────────────────────┬──────────────────────────────┐│
││## Monday 04 February 2019││I've created a homepage.│I'll serve it with websocketd.││
│└──────────────────────────┴┴────────────────────────┴──────────────────────────────┘│
├─────────────────────────────────────────────────────────────────────────────────────┤
│┌────────────────────────────┬┬────────────────────┬┐                                │
││## Thursday 07 February 2019││I added 2 new pages.││                                │
│└────────────────────────────┴┴────────────────────┴┘                                │
└─────────────────────────────────────────────────────────────────────────────────────┘

Finally, I wanted to stick them all back together again. I used ',' which is APL's catenate function. It appends the value on its right to the value in its left.

/ is APL's reduce operator, so ,/ is a catenate reduction.

Applied to a vector, it sticks all its elements together using catenate.

Here we go:

 show ⊃,/reordered
┌──────────────────────────────┐
│# Project journal for zero-web│
├──────────────────────────────┤
│                              │
├──────────────────────────────┤
│## Monday 04 February 2019    │
├──────────────────────────────┤
│                              │
├──────────────────────────────┤
│I've created a homepage.      │
├──────────────────────────────┤
│I'll serve it with websocketd.│
├──────────────────────────────┤
│## Thursday 07 February 2019  │
├──────────────────────────────┤
│                              │
├──────────────────────────────┤
│I added 2 new pages.          │
├──────────────────────────────┤
│                              │
└──────────────────────────────┘

Of course it would have been tedious to type all that in for each file I wanted to process, but I could combine all the steps into a single APL function.

      munge ← {⊃,/(1↑p),⌽1↓p←⍵⊂⍨1,1↓'## '∘≡¨3↑¨⍵}

Now I had a vector of vectors, ready to write out. I used a function I wrote earlier, called update, which creates a backup file and overwrites the original.

I combined the read, munge and update functions together into a function called fix.

     fix←{⍵ update munge read ⍵}

I had one last thing to code. I wanted to find all the project files called 'journal.md' located under the directory where I keep active projects. I could code that in APL, but Unix's find comment does that very well. Fortunately, APL lets me invoke a Unix command and capture the result as an array. The function find did just that.

      find←{⎕SH'find ',⍵,' -name ''journal.md'''}

So now I just needed to type

      fix ¨ find '~/git/active/'

and the job was done!

To recap, here's all the code I wrote and ran to solve my problem:

      munge ← {⊃,/(1↑p),⌽1↓p←⍵⊂⍨1,1↓'## '∘≡¨3↑¨⍵}
      fix←{⍵ update munge read ⍵}
      find←{⎕SH'find ',⍵,' -name ''journal.md'''}
      fix ¨ find '~/git/active/'

Now I'm going back to working on the Pomodoro timer :)

If you're curious you can learn more about this incredibly powerful language for data manipulation on Dyalog's website.

Friday, 1 February 2019

Pomodoro timer with ToF sensor in CircuitPython


Yesterday I started working on a fun application using a time of flight sensor.

It looks as if it's going to solve a problem I've had for years.

Pomodoro Technique Like many of my friends I use Pomodoro time management when I'm writing or coding.

The Pomodoro technique uses a timer to you to get up and take a five minute break after 25 minutes at the keyboard. This helps you focus during the 25 minutes of work and the break keeps you healthy and fresh.

The original Italian creator used a kitchen timer shaped like a tomato - hence the name.

I don't have a suitable kitchen timer so I use a web browser to access http://e.ggtimer.com/pomodoro.

That works well if I remember to start the timer whenever I sit down to write or code, and to restart it if I am interrupted. Often I forget, and that's annoying.

A while ago I came up with the idea of automating the Pomodoro.

My first idea used a pressure sensitive cushion on my study chair. I had some fun with this approach but it never worked well. For the last year the project has been sitting in my too hard box waiting for inspiration.

Recently Richard Kirby started experimenting with an inexpensive VL53L0X Time of Flight sensor which measures distance quickly and accurately. Richard runs the Raspberry Pint MeetUp in London, and you can see his project (and many others) on the MeetUp's Facebook page.

I thought I'd try and see if I could detect my presence at my keyboard using the sensor.

My Adafruit sensor arrived a few days ago and I wired it up to an Adafruit Feather m0 Express I had in my parts box. I used the VL53L0X demonstration code in the Adafruit tutorial and it worked well.

I've been writing the CircuitPython software using Nicholas Tollervey's Mu editor. This supports Adafruit boards as well as the micro bit and it's very easy to install on Windows, Linux and OS/X.

Things went well once I had sorted out some minor snags.

My Feather had been sitting in a box since last summer, so the copy of CircuitPython on the board was very out of date. I followed the instructions on the Adafruit website and updated it in a matter of minutes, along with the library bundle. After the update I tried the VL53L0X demonstration code in the Adafruit tutorial.

The Adafruit tutorial suggests that you run the code line by line in the Python REPL. I like that approach: you get immediate feedback. Things went well once I had sorted out some minor snags. These wilonly affect you if you are using Linux.

1. I had not added myself to the dialout group, which you must be in to access the serial port. I ran the necessary command

sudo adduser $USER dialout

but then hit another snag.

2. The REPL showed an AT command!

The Adafruit website explained that there's a piece of software called modem manager which is installed by default in many Linux distros. When you use serial communications it assumes that you're going to be communicating with a modem so it automatically issues an AT modem command.

The last time I used a modem was in the 1990s, so I purged the software from my installation.

After that the REPL worked perfectly and I got the distance sensor running in a matter of minutes.

I've now modified the example code to use the Feather's 3 colour LED to show the distance to the nearest obstacle. Here's a video.


Next I need to add the logic to control the pomodoro timing and to add a buzzer so that the application can alert me when my 5 minute break is up.

I will post here when I have made some progress.

By a happy coincidence I got an email from Mark Barto just as I got the sensor working.

Marc is re-running his annual Digital Making Showcase at the London Communications Centre on the 16th of March. He wanted to know if I had something to show. I'll be taking along the pomodoro application.

I thoroughly enjoyed last year's event. There were lots of interesting things to see and lots of keen makers, young and old.

I'll post details of the meeting once they are published, but in the meantime Marc is on the look-out for more projects to showcase.

If you have a project that you could show, do get in touch with Marc. You can tell him your project details here.