Posts

Showing posts with the label #RaspberryPi

Getting started with Pimoroni's Tiny 4WD Rover
Image
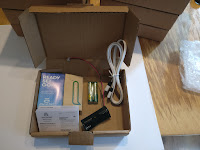
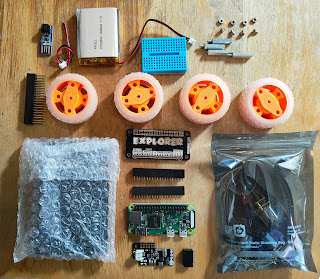
Kit contents with extras I just finished my book on the Pimoroni Explorer HAT, and I'm celebrating! I have treated myself to a Tiny 4WD Rover kit. It looks a lot of fun, and should be simple to assemble. The product page has a link to a great blog post from Emma Norling which has detailed build instructions. I'll be following that closely. I have already encountered one  minor gotcha . You need a few extras over and above the parts in the kit. Some of them are mentioned on the product page (battery, Pi zero W), but Emma found she needed spacers to mount the Explorer pHAT on the Pi zero W. I have suitable spacers in stock so I think I'll be OK. I also got a LIPO shim and a USB charger. Once I've completed the build I'll document it and provide a link on this blog. A nice bonus if you hurry!  Pimoroni are currently offering a free Pi Zero WH for customers spending more than £100 (excluding postage). The offer ends soon, but I managed to get my order in on time whic...

Explorer HAT book - two more draft chapters

    I've drafted a couple more chapters for Explorer HAT tricks . They need editing but I will publish a new version of the book with the new chapters next week. If you've bought it you will get the updates free of course. The video shows one of the projects - a simulation of a Pelican Crossing. You can find out more about the book here .

A little Raspberry Pi history

Image
a pre-alpha version of the Pi (reproduced with permission) A few days ago someone pointed out that it was eight years since Eben Upton's first blog post on the Raspberry Pi website. The site had actually been live for a while (from 6 May 2011), with just enough information to get me and others excited about the potential of the Pi. The website explained that the goal was to produce a low-cost Linux-capabable ARM-based board for educational purposes. That was interesting, but not world-shaking. There were already a few hobbyist SBCs (Single Board Computers), but they weren't cheap. I think the BeagleBoard was over a hundred pounds, and  you needed some specialised hardware to level-shift the 1.8V GPIO pins to a useful voltage. So how much was the Pi going to cost? According to the website The expected price is $25 for a fully-configured system. Back then, that was almost unbelievable. Indeed, to many, it was unbelievable. The early days of the Pi were dogged...

More Quick2Wire progress

Image
Quick2Wire logo If you've some Quick2wire hardware and you want up-to-date instructions for using it, you won't have long to wait. Qucik2Wire made and marketed some add-on boards for the Raspberry Pi. It ceased trading in 2012 but there are still a lot of boards out in the wild, and you can still buy kits from S K Pang . Sadly the website that told you how to use them is very out-of-date, as are the code repositories on GitHub. I'm doing my best to fix the problem. Quick2Wire boards Quick2Wire interface board The Quick2Wire product range included three hardware kits. All are still usable, and the software to use them now needs to be much simpler to use and install. I'll post information here as I update the relevant parts of the website and GitHub repositories. GPIO Pins and the downverter cable There's also one hardware problem but it's easy to fix. downverter cable The Quick2Wire boards were designed back in the days when every ...

Quick2Wire status update - a new lease of life?

Image
Quick2Wire Logo I've fielded several questions about Quick2Wire in the last few days, so it's probably time to explain what happened, where things are now, and what the future holds. Some of you won't have heard of Quick2Wire. It was a start-up that designed, manufactured and sold add-on boards for the Raspberry Pi. I founded it in 2012, along with a group of other designers and developers, and it did reasonably well for a while. What went wrong? Most team members had full time jobs, so they could only work on the project in their spare time. I ended up doing all the marketing, kitting, packing, posting and accounts. One consequence was that I didn't do enough marketing after we launched, and things became worse when our PCB designer became seriously ill. We needed office space for the stock and kitting area, and when sales fell off we could no longer cover our costs. Quick2Wire stopped trading in the summer of 2013, and was finally dissolved in Mar...

An array of micro:bits for the Raspberry Towers Jam

Image
Yesterday I mentioned that I'm running a BBC micro:bit workshop for the Jam at Raspberry Pi Towers on February 11th . The micro:bit kits from Kitronik have just arrived, and I'm expecting to finish the workshop materials early next week. The workshop uses MicroPython and the mu IDE running on a Raspberry Pi. It's suitable for beginners, and I think it will be a lot of fun. There's a bit more background in yesterday's post . I sill need a title, though. If you have a good idea for a title you can submit it here . If I use your title and you are the first to suggest it, I'll send you a free Kitronik Inventors kit , including a BBC micro:bit. Make sure you submit your idea by 10 PM UK today as I'll be closing the survey then!

Embedded development is faster with a REPL

Image
In my previous post I mentioned that I was frustrated by the slow pace of Arduino-style development and that I was looking at using a language with a REPL (Read-Evaluate-Print loop). A REPL is just a fancy name for an interactive environment. You can type an expression and have the computer evaluate it; the computer display the result immediately. (If you've ever used Python interactively you'll know exactly what I mean). Why REPLs are great REPLs give you immediate feedback. If you've done something right, you get an immediate reward. If you've made a mistake, you get to fix it while everything is still fresh in your mind. I find it makes for much faster progress, particularly if I am using hardware or software I haven't used before. They also give you a chance to do some stunning demos. Here's a video of two Dyabots dancing, courtesy of Morten Kromberg (CXO of Dyalog). A tale of two REPLs  C3Pi and Dyabot have two computers on board; a Pi to do ...

A new Raspberry Pi robot joins the family

Image
Yesterday saw the arrival of a Raspberry Pi robot kit from T he Pi Hut , and I'm finding it hard not to drop everything and have a play. The Pi Hut has close links with CamJam . CamJam is, I think, the first Raspberry Jam, based in the Cambridge area. Working with The Pi Hut they have created three excellent EduKits: inexpensive, fun kits which introduce Raspberry Pi owners of all owners to the fun of physical computing. The earlier kits came with excellent instructions and the Robot kit does too. I'm sure I will succumb to temptation and start exploring the kit in the next day or two. Expect a progress report soon. My immediate priority is more urgent. I'm talking at the BAA meeting tomorrow, and I need to make sure I'm properly prepared. Dyalog Visit I nearly blew it earlier this week. I went along to visit my friends at Dyalog to talk about my neural network research and show them APL running on the new Pi zero . I thought I had taken everything ...

The new Raspberry Pi zero is here - and it's snappy!

Image
Spot the difference! The new Raspberry Pi zero is out and it has a camera connector . The picture on the right compares the new zero with its predecessor. They are very, very similar but the clever folks at Pi towers have re-routed the board to make room for a camera connector while keeping the size of the board unchanged. I've had a chance to play with the new Pi for a few days now and I love it. You can read my plans below but the main thing is that the new feature has been added without sacrificing the zero's already awesome capabilities. As you'd expect, existing software runs just as it did before. The new zero is currently in stock at several dealers in the UK and the USA. Details are on the Raspberry Pi website . Dealer info is at the bottom of their post. A camera has been one of the most-requested features for the zero. It opens up a huge range of new, exciting projects. There will be a huge demand for the new zero. Let's hope the stocks hold out ...

Neural networks on the Raspberry Pi: The Neuron

Image
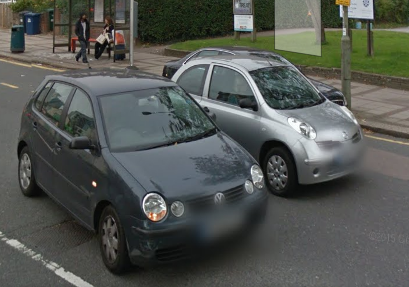
A brief introduction to ANNs - part 1 ANNs (Artificial Neural Networks) are systems that can process information using connected components called neurons . ANNs are inspired by real (biological) neural networks like the brain. ANNs are widely used for real-world information processing tasks. In the image below (courtesy of Google Street View) you can see that car number plates have been blurred. Google hides them to protect privacy, and the software that recognises what to blur is a Neural Network. Image courtesy Google StreetView The software   As I said yesterday , I developed the software in APL on a Raspberry Pi. You’ll find instructions on how you can run it further down. Neurons An ANN is made up of neurons . Neurons are usually grouped into one or more layers. Many types of neuron have been proposed, but they all have certain characteristics in common. A neuron has one or more inputs and a single output. Associated with each input is a weight....

Big data on a small computer!

Image
Neural Networks on the Raspberry Pi I've been having some fun experimenting with ANNs ( Artificial Neural Networks ) on the Raspberry Pi . I've been interested in ANN research for a very long while: I wrote my first simulator back in 1974. I developed that first version in ALGOL60. I've recently re-written and extended it in Dyalog APL , and now it runs on the Raspberry Pi. Why APL? I've found APL a great choice for ANN research and education, for several reasons: It's easy to learn, and fun! It's concise and easy to test. It handles arrays naturally. It has a rich set of primitives for data manipulation and calculation. It supports a pure functional programming style. Dyalog APL has great support for parallel computing. The Raspberry Pi version is free for non-commercial use. Inexpensive ANN computing I'm using a Raspberry Pi B model 3, but it runs acceptably fast on earlier versions of the Pi. I haven't yet tried it on the Pi ...

The Greenhouse project - Websockets, Pi, Wireless, Arduino

Image
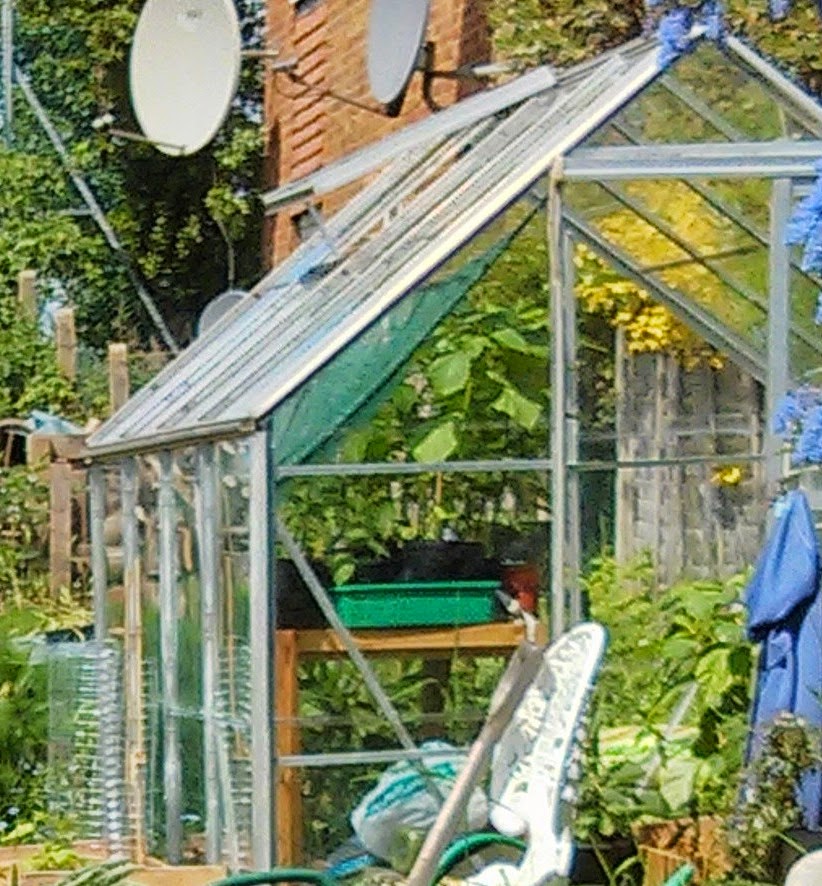
I went along to the Raspberry Pint meetup last night. It's a lively and friendly group, and I'll be going again next month. I'd been asked to do a lightning talk, and gave an update about my Greenhouse monitor project. The background My wife and I have an allotment that's just over half a kilometre from our flat. On it there's a greenouse. At this time of year the greenhouse is full of tender seedlings and my wife likes to protect them from fluctuations in temperature. I've been working on a remote battery-powered monitor which will live in the  greenhouse and transmit temperature data over wireless (not WiFi) to a Raspberry Pi at home. The Pi will log the data and display historic values on a website which we can view from a browser or smartphone. Testing the range I'm currently using a +Wireless Things  XinoRF talking to a Slice of Radio board attached to the Pi. I need to verify that the transmitter is powerful enough to send a signal that t...