Posts

Showing posts with the label BBC micro:bit

Mu, Edublocks and the Kitronik Inventor's kit
Image
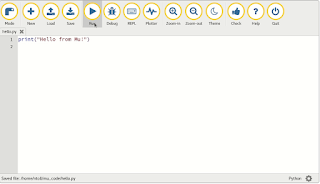
A friend of mine recently asked me about Python programming on the micro:bit. I told him that I wrote a free workbook about that a while back. (If you'd like to get a copy you can sign up here ).   It's based around the excellent mu editor . Code with Mu Mu is a no-frills editor that you can use to develop and run programs on the micro:bit , Adafruit CircuitPython boards , the Raspberry Pi and other Python environments Mu has just enough features to be usable without being daunting. I love it. But some young students find text-based programming a bit scary. How can they get started? Code with Edublocks Some younger programmers are happier with block-based (visual) programming. For them, Edublocks is a great solution. Edublocks is block based, runs in your browser, and looks like the popular Scratch environment, but it's Python-oriented . Here's the Edublocks version of the code for the first experiment for Kitronik's excellent micro:bit Inventor's Kit ....

Build details for Anastasia

Image
I've uploaded pdf files with full build instructions for Anastasia the micro:bit robot and the power strip I made for her. These are free/immediate downloads, no email required. Links: Build Anastasia the micro:bit robot Power Strip Build Guide

Bill of Materials for Anastasia - build instructions coming soon.

Image
I've added a Bill of Materials for Anatasia the home brew micro:bit robot in her GitHub project . They are in the project README. I'll add building instructions here and on GitHub over the week-end. Meanwhile, here is a video showing her in action:

Driving Anastasia's Kitronik motor controller via radio

Image
Anastasia with the controller This is the fourth in a series of articles about Anastasia - a home-brew robot based on the micro:bit. In my previous post I shared the micropython code that runs on Anastasia's remote micro:bit controller. The controller can send one of five commands to Anastasia : stop applies a brake to the motors. left spins the robot anti-clockwise. right spins the robot clockwise. forward ( you guessed it1) drives the robot forwards. backward also does what you'd expect. In this post I'll step through the code than implements these commands on Anastasia. The code looks for incoming radio messages. It translates those messages into methods on a Driver class. These methods then send control signals to the  Kitronik motor controller. Here's Anastasia's code The code starts with the necessary imports, and then begins the definition of the Driver class. from microbit import * import radio class Driver: "...

Controlling Anastasia from a second micro:bit

Image
This is the third in a series of four articles about Anatasia, a home-brew micro:bit based robot. Here's the full list of articles: 1. The original article introducing the robot. 2. A short update when I released the code on GitHub. 3. This detailed walk-though of the controller code. 4. A detailed walk-through of the code that runs on the robot .  The code for Anatasia and her controller is finished. It's simple and it's all working well. You control Anastasia via a separate hand-held micro:bit, which communicates using the micro:bit's built-in radio. You tilt the controller and Anastasia responds by advancing, retreating or spinning to the left or right. Anastasia stops when you hold the controller level. Here's the controller code: Controller Code   The controller code starts with a bit of set-up from microbit import * import radio radio.on() # The critical value for tilt detection. # A lower value makes the controller more sensitive. ...

Anastasia is a simple home-brew robot - now on GitHub

Image
Anastasia V1 Anastasia (my latest home-brew robot) is now on GitHub . The code is described in a series of articles on this blog. I've listed them at the end of this post. I've made rapid progress with Anastasia and will do more work on her today. Anastasia is currently driven by a pair of micro:bits. The motor is managed by an on-board micro:bit connected to a Kitronik motor controller and I control Anastasia over radio using a second micro:bit. Anastasia is working, but needs some minor enhancements to the code and electronics. I may also need to replace the motors which run a bit unevenly. Once I've done the upgrades I'll post a video of Anastasia in operation. Soon I'll replace the on-board micro:bit by an Adafruit clue which will be controlled via Bluetooth. Eventually I'll add an on-board camera. Articles in this series: 1. The original article introducing the robot. 2. This short update. 3. A detailed walk-though of the controller c...

How to program a simple homebrew micro:bit-based Robot

Image
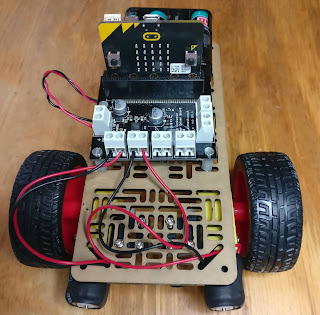
This afternoon I assembled a simple micro:bit mobile robot. It uses the Kitronik motor driver board and some Adafruit motors. I like the Kitronik board. It's easy to use, well documented, and the build quality is good. I'll be making some minor mods over the next couple of days. It needs a ToF Lidar sensor to make sure it doesn't bump into things and I plan to power it from a phone charger battery with an additional on-off switch. I'll use a second micro:bit to control it via radio. Update! There are now four articles in this series, and the robot has been named. It's called Anastasia. Here are the articles: 1. This introduction. 2. An short update when I released the initial code on GitHub . 3. A detailed walk-though of the controller code. 4. A detailed walk-through of the code that runs on the robot . Simple control code The test code I wrote to check the wiring was very simple. from microbit import * left = (pin16, pin0) right = (pi...

An I2C keypad for the micro:bit - part 2

Image
A working prototype I've now got a home-brew Arduino clone reading the keyboard and sending key-presses to a micro:bit using I2C. Preparing the Arduino clone was trickier than usual. As I mentioned in yesterday's post , the Arduino needs to run at 3.3 volts. That's the working voltage (V cc ) for the micro:bit, the Pi and the Jetson Nano. Connecting I2C lines from a 5v device would damage them, so 3.3 v operation is essential. I have a good stock of ATmega328P chips left over from the days when I was running Shrimping workshops. The ATmega328P  works well at 3.3 volts, so long as the clock frequency is no more than 8 MHz . Most Arduinos run at 5v with a clock speed of 16 MHz, so there's work to do.   8 MHz clock issues If I2C is to work reliably at 8 MHz the Arduino needs to be configured for an 8 MHz clock, and it needs a bootloader that works at that clock rate. My first step was to wire up a working clone on a breadboard with an 8 MHz crystal and i...

Adafruit Clue - love at first sight

Image
My Adafruit Clue has just arrived, and I am delighted with it. The Clue is a small single board computer that has the same format and connectors as the BBC micro:bit . It's more expensive than the micro:bit but it's a much, much more capable device. micro:bit Pros and Cons  I still love the micro:bit. It invites you to interact with it as soon as you power it on and it's introduced a huge audience to the pleasures of programming. There are a range of programming options for the micro:bit, including micropython, and it's easy to program using the free mu editor.  However, it has some frustrating limitations. The micro:bit's 5x5 LED display is cute, but scarcely high-resolution. There are a few on-board sensors - an accelerometer and a magnetometer - and you can coax the processor chip into telling you how hot it is. It has a couple of buttons, and it supports radio communication with other micro:bits. But that's all. It also has quite limi...

An excellent TeachMeet in Manchester

Image
Fake news? TeachMeet in Manchester I went up to Manchester on Thursday to join a TeachMeet organised by Alan O'Donohoe and friends. Several of us presented free resources for teachers to share: you can see the full list, and find links to resources here . It was a lively session and as usual the teachers made me feel very welcome. (Many also downloaded the free micro:bit MicroPython workbook , which was very gratifying). Each time I meet UK teachers of Computer Science and Design Technology I am amazed at how much new syllabus content they have been asked to take on board and how little resource they have been given to meet the challenge. If you are based in the UK and have a background in Computing, there are many ways in which you can help. Here are a few: Join a local Code Club as a volunteer Become a STEM ambassador for STEMnet Join the Computing at School community and create Open Source resources which teachers can use. You'll be making a real diff...

MicroPython and micro:bit workshop - London 29 March

Image
I'm running a workshop on the micro:bit and MicroPython in London on 29th March. It's been organised by an old friend, Marc Barto, who runs the London Arduino meetup. London Arduino is not just about Arduino; they are interested in a whole range of computing topics, including the wonderful micro:bit. The workshop is free but numbers are strictly limited so sign up now to be sure of a place!

micro:bit, MicroPython and Vex Robotics - hope for the future

Image
micro:bit and MicroPython workshop at Pi Towers Pi Towers Workshop (c) David Booth Last Saturday I joined Ben Nuttall and other friends at the Raspberry Jam held at Pi Towers in Cambridge. I ran a brand new workshop using a Raspberry Pi to program BBC micro:bits in MicroPython. It went really well. The young had a lot of fun, as did their mums and dads. I've turned the workshop workbook into a free eBook. You can get it here . I'll also be running the workshop again in London. Follow me here or on twitter for more information.   Vex Robotics  A team from Henrietta Barnet present their work On Tuesday I headed to Highgate Junior School where they were hosting a Vex Robotics competition. I'd been invited by Andy Thompson who is Director of DTE at Highgate. Last year Highgate team System32 won the UK National Championships qualified for the World Championships in Kentucky USA in VEX Robotics, so I expected a stiff competition. I helped to judge a v...

And the winner is...

Image
Andy of workshopshed fame came up with the winning title for Saturday's micro:bit introductory workshop: 'Microbit MicroPython in 60 minutes'. Thanks to everyone who entered. You had some great ideas, but I'm going with Andy's entry. His title is short and to the point. It tells you exactly what to expect. Andy's Kitronik inventor's kit is on its way to him, and he is kindly sending me a really useful bit of hardware in return. It's a BitScope blade duo Pi . Since Dyalog APL can seamlessly use multiple cores on multiple CPUs that gives me an 8-core 2Gb super-Pi for my Neural Network research! I didn't expect to get anthing in return for the inventor's kit, but that sort of response is what makes it so great to be part of the maker community. Thanks, Andy. If you want to get started with MicroPython on the micro:bit, and you're in the Cambridge area, why not come along on Saturday? You can book here .

An array of micro:bits for the Raspberry Towers Jam

Image
Yesterday I mentioned that I'm running a BBC micro:bit workshop for the Jam at Raspberry Pi Towers on February 11th . The micro:bit kits from Kitronik have just arrived, and I'm expecting to finish the workshop materials early next week. The workshop uses MicroPython and the mu IDE running on a Raspberry Pi. It's suitable for beginners, and I think it will be a lot of fun. There's a bit more background in yesterday's post . I sill need a title, though. If you have a good idea for a title you can submit it here . If I use your title and you are the first to suggest it, I'll send you a free Kitronik Inventors kit , including a BBC micro:bit. Make sure you submit your idea by 10 PM UK today as I'll be closing the survey then!

Please help me with a title!

Image
I'm running a workshop on Saturday 11 Feb at Raspberry Pi Towers in Cambridge. I'm really looking forward to it and it should be great fun. I've got just one problem: I need a good title . Let me tell you a bit more about the workshop and explain how you can help. The workshop In 60 minutes beginners will learn how to program the BBC micro:bit using MicroPython. They will be using Raspberry Pi computers linked to micro:bits and will use the mu application on the Pi to write and upload their programs. I'm not sure of the age range. There may be young programmers with their parents, some grand-parents, silver solderers like me, and every age in between. We'll be providing the hardware but they will have to give it back at the end of the workshop. Please help me find a title! I 've set up an online survey . It asks for your idea for a title and your email address. (That cuts down on spam and ensures one entry per person.) You can also subscribe ...

A simple reaction timer in MicroPython on the micro:bit

Image
The micro:bit continues to surprise and delight me. My project yesterday was to write a simple reaction timer in MicroPython . The timer application was really easy to code. I'll build up a subset of the code step-by-step, but the whole program is on GitHub . You can download it here . Here's how the code works: The program starts by displaying a clock image: display.show(Image.CLOCK1) Next, it picks a random time to wait, ranging from 500 ms to 4500 ms. (In other words, it will wait between half a second and four-and-a-half seconds.) sleep(random.randint(500, 4500)) When the time has run out it displays a happy face: display.show(Image.HAPPY)   Then it checks every tenth of a second to see if the user has pushed button a (to show they have seen the image, keeping count while it waits. def time():     # returns the time until waiting is over, in 1/10 secs     count = 0     while waiting():    ...

MicroPython on the BBC micro:bit - easy as Pi

Image
The BBC micro:bit really makes it easy for you to get hooked and get coding with MicroPython. Like Python, the micro:bit comes with batteries included. Plug in the battery and an irresistible introductory app launches. Many newcomers will use the Scratch-like block coding environments. If, like me, you prefer to program in Python, a couple of clicks on the micro:bit website will show you how to upload and run your own code. When you connect the the micro:bit via USB, it appears as a removable USB drive and you can just drop your code onto the drive to flash (install) and run your program. There's a browser-based interface to the compiler, but I'm using the mu editor on the Pi. That way I can maintain my source files on Github, and I'll be sharing them once I have something useful to show. I'm hoping to start coding the controller for C2Pi in the next few days. For now I'm working my way through the great examples available on the micro:bit website and...