Pages

Wednesday, 30 November 2011

Java USB HID client for mbed Logic analyser

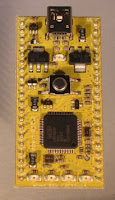
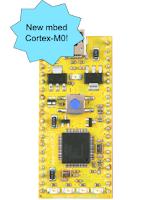
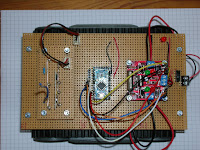
mbed lpc11u24 beta kit
I've been using a Python client while developing my mbed USB-based logic analyser, but the pywinusb package only runs under Windows. Since my desktop is now a Windows-free zone, I've been having to

  1. Fire up VirtualBox
  2. Start up a Windows XP VM
  3. Plug a USB connector into the mbed
  4. Tell VirtualBox to give the VM access to that USB device and
  5. Curse at the fact that I'm restricted to the much slower version 1.1 of the USB protocol
I've now switched to a Java package which runs under Ubuntu. Details on the mbed site.

The next step should be to do some timings, but I won't be able to run at full speed until the chaps at mbed have finished porting one of the libraries I need to the new beta mbed LPC11U24.


Let's make robots

I just re-discovered Let's Make Robots - a site for robot builders to show off their work, exchange ideas and learn from others. It looks like a great resource with a friendly community.

If you're a robot-builder, take a few minutes to register and post details of your robotic creations.

Another slithering soft robot

Soft robots keep popping up (or slithering along) all over the place. I'm beginning to think I ought to take a closer look at the technology in my copious free time. I wonder how well a combined crawler/gripper would function underwater.

Oops - missing BeagleBoard posts


I've just realised that I placed a couple of posts on the BeagleBoard over on my Application development blog, when I meant to post them here.

I won't cross-post, but here are the links:
Busy with the BeagleBoard and Blogging from the Beagleboard. Together they give a bit of background to some of my later posts.

Tuesday, 29 November 2011

Happy with this Hub

While working on the mbed logic analyser, I realised I had run out of USB ports on my workstation. A quick search on Amazon suggested this D-Link DUB-H7 7-port USB 2.0 Hub. I ordered one and it arrived today.

Nothing earthshaking, but it works well, looks nice and is reasonably priced. Recommended.

Monday, 28 November 2011

Pololu I2C Gyro, accelerometer and compass

My black Friday Pololu order arrived this morning. I'm delighted with the purchase, and one item in particular has blown me away.

It's a MiniMU-9, which combines a triple-axis gyro, a triple-axis accelerometer and a triple-axis magnetometer. In other words, it measures all the data you need to work out the position and orientation of a mobile robot. And it's tiny.

To give you a feeling of its size, the connector holes in the image are 0.1" apart, and it weighs just under a gram.

Now if only I had a small, low-cost lightweight, Linux-capable board to control it, I could build an autonomous blimp. But that's just Pi in the Sky :)

Seriously, the Raspberry Pi (described in the Register article linked to above) is well-suited to the job of managing an autonomous blimp. It's true that the gumstix is even smaller than the Pi, and available this month rather than next; but it costs a lot more.

Meanwhile I have projects stacked up that will keep me occupied for the foreseeable future. I have more work to do on my beta mbed project, and I need to post more Python I2C code for the Beagleboard. Meanwhile TrackBot is still waiting for a working radio link.

Christmas is going to be busy this year.

Friday, 25 November 2011

Progress on the mbed Logic Analyser

LPC11U2 mbed
I'm making steady progress on my Logic Analyser project for the new beta version LPC11U24 mbed. So far everything has worked as it should, although one or two libraries are still being ported to the new device.

I can already send the state of an 8-bit wide set of mbed inouts to the PC over a USB HID connection. I have now idea how fast the final version will be, but it should be able to analyse fast  (400kHz) I2C and some SPI interactions in real time.

Hendrik Lipka (another mbed user) suggested that I might adapt the open-source SUMP client so that it can capture, analyse and display data on the PC. That's an exciting idea which I will certainly follow up.

Thursday, 24 November 2011

Qt developers - could you get a free Raspberry Pi?

If you're a creative developer with experience of the Qt cross-platform framework, you just might get a free Raspberry Pi Linux-based microcomputer courtesy of Nokia.

(If you're unfamiliar with this credit-card sized wonder, this video will give you a great introduction).

Nokia are looking for people who will port software, develop apps, and test and improve the Qt 5 Linux stack. They are so keen that they have funded 400 vouchers for Raspberry Pi.

If you have a visible track record as a Qt developer, and a good idea for a relevant project, head off here to find out how to apply for a voucher. Last time I looked there were 65 applications for those 400 vouchers, so hurry along!

mbed - USB made easy!

mbed nxp LPC11U24
I'm having great fun with the new mbed. Just working my way through the examples so far, and everything is working well.

The photo show the mbed pretending to be a USB mouse.

I'm looking forward to getting stuck into my logic analyser project; once that is finished I may hook the mbed up to my pseudo-microwriter and turn it into a USB device.

The new mbed m0 has arrived!

I mentioned a few days ago that a new mbed was on its way. It's still in beta, but I was lucky enough to be selected for the beta program and I am starting work on my project.

First impressions are very positive: the instructions on the mbed site are very clear. It took about two minutes to use the cloud-based compiler to create the obligatory led blinking program and then drag the binary file over to the mbed.

Now to work through the examples and test it out as a USB device.

Pololu Black Friday offers include mbed-based robot

Like many US retailers, Pololu are offering massive Black Friday discounts on a range of their robotics products.

Some of the bargains:

  • 33% off the m3pi mbed- based mobile robot (you will need to get your own mbed)
  • 50% off a pair of wixels
  • 30-60% off various motor controllers
  • 40% off the MinIMU-9 Gyro, Accelerometer, and Compass
The last item looks perfect for an autonomous vehicle/aircraft navigation system.

There are also flat discounts available, depending on the size of your order; these can be combined with the individual product discounts.

I just saved $150 on a $350 order.

One thing to take into account: if you're buying from outside the USA you will have to pay local taxes and a processing fee to the shipping agent when the goods arrive.

The offer is time-limited, and will expire  at 11:59 PM PST on Monday, November 28 (7:59 AM GMT on Tuesday, November 29).


Wednesday, 23 November 2011

Young inventors at Google

Yesterday Google hosted a qualifying tournament for the Bay Area First Lego League (FLL) at their Mountain View Headquarters.

Imagine the excitement of the 9 to14 year-olds as they arrived at Google headquarters. They will remember the event for the rest of their lives, and who knows what they will achieve in the years to come.

At a time when news is full of economic gloom, it's great to see the excitement and creativity of the young, who are living at the start of a golden age of maker technology.

Parallel Processing for Embedded Systems

image courtesy GreenArrays, Inc.
GreenArrays have announced the GA144, a low-energy processor with 144 cores. It's not cheap, as the minimum order is for 10 $20 chips, and the development board is $450 dollars, but it's of great interest to me; next year I will need some real processing power for a neural-network robot I am working on, and this looks as if it would be ideal.

Robotics enthusiasts will probably be familiar with the Parallax propeller, an inexpensive multi-cored processor that is desgined for hobbyist use. The propeller is an affordable introduction to parallel processing, but the GA144 offers a couple of orders of magnitude more processing power and is very energy-efficient.

The chairman of GreenArrays is Chuck Moore, the inventor of Forth. The GA144 supports arrayForth, a powerful language for parallel computing.

Tuesday, 22 November 2011

Raspberry Pi sticker delay verfies project commitment

A few days ago I mentioned the new Raspberry Pi stickers which sold out as soon as they were on offer.

The Raspberry Pi team ordered a second batch, but these took longer than expected to arrive.

It's heartening to read people's reactions to the apology for the delay.

You can see that there is huge commitment to the project from supporters around the world.

Raspberry Pi is potentially world-changing, and I think the foundation will be astounded and delighted by the strength of the effort to create free software to help this fantastic product achieve its promise.

And remember - while we're waiting for the Pi itself o get through QA, you can support the foundation by ... buying some stickers :)

A fast logic analyser using the new mbed cortex-m0

I've just heard that I have been accepted for the beta test program for the new mbed cortex-m0.

I'm going to build a logic analyser which transfers data  via the USB interface to a PC for analysis and display.

While one can do this using the existing mbed and serial communication's, I think the USB approach should support significantly higer data rates.

I've set up a new project page in my notebook at mbed.org. Comments and suggestions welcome!

Saturday, 19 November 2011

Bluebot-L the retired veroduino robot

Bluebot-L
We learn by our mistakes, but it can be cheaper and less painful to learn from the mistakes of others. Here's one of my mistakes; I hope the story will save you time and money.

A few months ago I started work on a wheeled robot based on Veroduino - an Arduino clone build using Vero strip board.

I had a wheeled base which contained a couple of geared motors. They drew a fairly low current so I decided to use a TC4427A h-bridge controller on a shield-like board that sat atop the ATMega326 micro controller. I decided to use separate power supplies for the controller and the motors;  I bought a couple of battery holders, each taking 4 AA cells.

I used foam plastic for the base; it's easy to cut and drill,  and it's lightweight, but strong enough for the job (so long as it isn't crushed). Construction was rapid and I soon got to the point where I could try it out on a simple line-following exercise.

Disaster! The batteries at each end contributed to a really high moment of inertia (MoI). When the robot turned, the high MoI meant that it over-corrected and hunted around the line without ever settling down. It swung rapidly from side to side like a boat in a raging stream.

The hunting was made worse by the length of the base; a small turn to the left or right moved the light sensors by a couple of inches, so it was surprising that it followed the line at all. Sometimes it didn't, and raced off looking for something new to follow.

Fun to watch but not very satisfactory.

I could have compensated for the MoI by tuning the software, but it was obvious that this was a flawed design. So Bluebot-L has remained in a project box, waiting until I have time to sort out a better designed base.

Trackbot
Meanwhile I have moved on to Trackbot. I'm pleased with the first iteration for Trackbot, but I still have a couple of unanswered questions about its capabilities, and more experiments to do.

I'll post more about Trackbot later this week-end.


Friday, 18 November 2011

Beagleboard xM and DM3730-EVK Eval Kit - similar products, separate niches

Windows for Devices just published an article suggesting that a recently launched product from Embest and Farnell was taking on the BeagleBoard xM.

The  DM3730-EVK from Farnell is based on a TI DM3730 chip - a Corterx A8 with DSP capability. It comes with 512Mb of flash and 512Mb of RAM; the kit also includes a 4.3" screen. Out of the box it boots linux or WinCE. It's priced at £353.00 + VAT.

The BeagleBoard has 512 Mb of RAM and the same TI chip; LED screens are separately available, as is WinCE. It costs £124.80 + VAT. A touch screen might add another £120 to that.

However, there's a more fundamental difference between the products.

The DM3730-EVK is clearly aimed at the commercial market. It seems to be a stable design which you could sensibly use as the basis for pilot (small-scale) production of a commercial product.

The Beagleboard explicitly warns that it's not intended for production use, largely because the team reserve the right to change the design whenever they come up with improvements. Great for prototyping or proof-of-concept, and inexpensive enough for anyone who wants to try out a new idea.

Both are available from Farnell:


A creepy snail-like soft robot from MIT

Soft actuator: DRL, CSAIL, MIT
One of the members of Premier Farnell's element14 has just posted about a soft robot which uses hydraulics to move around.  (The post suggests there are chemical reactions involved, but that doesn't seem to be the case).

The picture shows an actuator like those used to move the robot.

If that's not scary enough, you can watch a video.

I find the snail-like creature rather scary; it wouldn't be out of place in Doctor Who. Luckily it moves so slowly that escape would be fairly simple, unless you're surrounded by the beasts!

The original poster cited a paper on the Distributed Robotics Laboratory Wiki. You'll find many other fascinating robotics projects described there.

It's a great place to look for inspiration if you want to start a robotics  project that would really stand out.

Thursday, 17 November 2011

The new mbed is coming

mbed (courtesy of NXP)
Last year marked the debut of the mbed - an ARM-based System-on-a-chip from NXP in a compact 40-pin DIL format.

I was lucky enough to be selected to do a road-test for Farnell's element14. The mbed is an amazing product.

One of its great strengths is the large support library which includes code developed by the mbed team and by its users.

With I2C, SPI and Serial suport, and a full set of GPIO pins, it's easy to interface to external devices, and the web-based compiler means that you can program the device within 5 minutes of opening the box.

Now a second mbed is in beta-test. Based on the NXP LPC11U24, it  is designed for prototyping USB devices, battery powered applications, and 32-bit ARM Cortex-M0 designs. I'm hoping to get my hands on one soon and will report in due course.

The original mbed is still selling well, and is available from Farnell for just under £40 + VAT.

Wednesday, 16 November 2011

Raspberry Pi - some future customers?

People have been speculating about what young users will do with something like Raspberry Pi, the $25 dollar computer. Here's a clue from TED.

I've had lunch with two friends in the last couple of days. Both have children at school. Both
 really warmed to the idea of Raspberry Pi. They're optimistic that it would encourage their children to program, rather than just play games and hack visit social networking sites.

I can guess what the young may be getting from Santa this year.

Low cost Arduino Project box from Oomlout - now in colour!

Oomlout have come up with a neat design for a (nearly) free project box for Arduino. It's printed on 210 gsm card stock; you print it, cut it, fold it, and voilà - a simple but functional home for your Arduino creation.

I'm working on a project right now that could use one of these. I'll pop out for some card stock and have a go.

Update: My local Stationers (WH Smith) have packs of white 220 gsm card stock for a little over £3 , and they also have mixed packs of coloured card. So you can make yourself a coloured project box if you want.

Twice Pi from Raspberry Pi

I ordered stickers from Raspberry Pi, and they arrived this morning. Like their namesake they are fully functional but very small.

While you're waiting for a chance to buy the real thing, drop by their on-line store and buy a sticker!

BeagleBoard Python I2C code and examples on Github

I've pushed my Beagleboard Python I2C library up to GitHub, along with the sketch I used to create an  Arduino I2C slave that drives an LCD. (A slave driver?)

It's in a public repository at git@github.com:romilly/beagleboard-i2c.git

This is alpha code; the API will change;  the code may not work and/or may do bad things. Use it at your own risk.

More coming soon. (Stop press: that will include a non-blank README )

If you aren't familiar with Git/GitHub,  there is good reference material here.

Tuesday, 15 November 2011

Arduino drives 4-row I2C LCD from Robot Electronics

Robot Electronics offer a very nice 20x4 LCD display with I2C/Serial interface for £19.99 + VAT.

I've hooked it up to an Arduino; it's easy to drive and looks very professional.

I stumbled across Robot Electronics while searching for LCD suppliers.
It turns out that they are the on-line trading arm of Devantech, whose Ultrasonic Rangers are widely used in Robotics Projects.

Their full range of products is much wider than that, and their on-line shop is well worth a visit.


Raspberry Pi - final artwork

Raspberry Pi
Raspberry Pi have just published the final artwork for the board.

It's fascinating (and rather scary) to see how they have managed to compress a linux-capable System-on-a-chip onto a board the size of a credit card.

The first boards are expected in December; meanwhile, if you'd like to help test their online shop you can buy a Raspberry Pi sticker.

Monday, 14 November 2011

Make: Arduino Bots and Gadgets (Review)

Arduino Bots and Gadgets is a step-by-step guide to building, adapting and designing prototypes based on the Arduino family. It's published by Make magazine - a member of the O'Reilly Family.

Like Make, the book delights the eye. Readers are drawn into a programme of exploration and discovery which will help them develop the skills they need to start prototyping their own inventions using the Arduino Platform.

The authors write clearly and the projects look fun to build:
  • a Stalker Guard
  • an Insect Robot
  • an Interactive Painting
  • a Boxing Clock
  • a Remote for a Smart Home, and
  • a Soccer Robot
I have one niggle: the first project uses an Arduino Nano, rather than the Uno which is mentioned at the start of the book. Readers might feel a little miffed if they'd bought the Uno only to find they needed another variant.

That's a minor complaint, and my overall reaction to the book is very positive. The book is clear, attractive, authoritative, and (at nearly 300 pages) excellent value.

If you want something more substantial than a basic experimenter's guide this book is a great buy. I got the electronic version, but it's also available in print. If someone you know wants to make a start on serious Arduino development this could be an ideal Christmas present!

Sunday, 13 November 2011

Minibloq - a graphical programming environment for the Arduino

We're seeing a great and welcome upsurge of interest in introducing school children to programming, rather than just teaching them how to use Powerpoint, Word and Excel.

  • Jason Gorman got programmers and teachers together at Bletchley Park this Summer to look at ways of bringing programming into Schools
  • RaspberryPi, inspired by the success of the BBC micro in the '80s is aiming to fire up the next generation of school-age programmers
  • the Arduino, along with introductory kits like Oomlout's experimenters kit  has made the Internet of Things accessible to beginners of any age
  • MIT's Scratch has children and adults creating their own interactive stories, games, music and art
And now there's Minibloq.

Minibloq

The Arduino blog recently announced Minibloq v0.8 - a visual programming environment for the Arduino. It's aimed at  the creative at heart non-programmers, and I couldn't resist a play. (I leave it to those with whom I've developed software to decide whether or not I meet the criterion.)

The software has been developed under Windows, which is appropriate for the intended audience. My study is normally a windows-free zone; I could have installed Wine (the software that allows you to run a lot of Windows Software under Linux), but it seemed simpler to fire up a VirtualBox VM running Windows XP.

Once I'd done so, it took a minute or so to download the 72Mbyte package, and a couple of minutes to write a simple led flashing program. I have to confess I didn't read the documentation, but the interface is intuitive enough that I didn't need to.

There are plenty of examples on the website, and a demo video on the blog. Minibloq is fun, and I intend to play with it some more over the next few days.

One of the features I like best is that you can ask to see the code that's being generated as you develop your program. The visual interface is very accessible, but when you're ready Minibloq will help you transition painlessly to text-based programming.

Congratulations to the Minbloq team. Great work. We'll hear more about this software.

A Curriculum of Toys: review.

I've just been enjoying  A Curriculum of Toys - an article in Make Magazine by Saul Griffith. (Thanks to +Limor Fried for the link).

Griffith examines the ways in which children can learn from toys. He lists the skills that great toys can help to develop, and looks at activities which foster those skills.

Play is a core part of learning, and good toys promote good play.

On Sunday mornings, years ago, my daughter Alex and I would steal quietly downstairs to listen to music and build things. We started when she was two, building things with sticklebricks, then moved on to duplo and  LEGO.

She and I are convinced that those Sunday mornings played a part in fostering her Maker skills. If you want to see what she's made with them, take a look at Let's Get Prehistoric.

Some people dismiss play; they consider it at best a break, at worst a waste of time. Saul Griffith takes the opposite view. Play helps us, as children and as adults, to develop, to interact with others, to find out who we are and to express our natural creativity.

Playing with good toys is a great educator. Saul Griffith's article spells that out in concrete, practical terms.


Saturday, 12 November 2011

Pre-order the BeagleBone at Farnell

Premier Farnell UK

You can now pre-order the BeagleBone

at Farnell UK, or ask to be notified when it's available. With availability expected in mid-November, you shouldn't have long to wait.

The BeagleBone is a hardware hacker's dream, with a compact format, low power consumption, plenty of I/O and enough processing power for serious real-time computation.

If you want to interface with the world outside, connecting to sensors and drive LEDs, motors and relays, the BeagleBone has the capacity to do it.

The BeagleBone has stirred up a lot of interest, and the first shipment is likely to sell out fast; if you want to get your hands on one, pre-order today!

Friday, 11 November 2011

I2C links BeagleBoard and Arduino with LCD - conclusion

The BeagleBoard is now chatting happily to a boarduino over I2C. I'm running my simple Python script on the BeagleBoard and text is appearing on the boarduino's LCD.

I switched to the boarduino because I had one sitting in  a drawer, and I knew from earlier this week that a 16MHz ATMega328 could handle the BeagleBoard's fast (400kHz) I2C.

The boarduino is designed for use with a prototyping board, and it has a very compact form factor. I'll probably transfer boarduino and LCD to a semi-permanent strip-board home.

The BeagleBoard can rest for a day or two; I'm working on TrackBot, sorting out the Radio problem that I encountered earlier in the week and adding a Pololu IR proximity sensor to help avoid damaging collisions. After that it will be time for a retrospective review, and I can start planning B4 - the BeagleBoard Based 'Bot.

Priming the pump at Raspberry Pi

Update: The first batch of stickers sold out in 24 hours!


More are on their way, and you can pre-order the stickers (but not the Pi!) from the website.

A lot of people are getting very excited about the imminent launch of the Raspberry Pi. It's an ultra-low cost Linux-capable board based on an ARM11 core, and it's due to go on sale in December.


If you want a quick overview of the Pi and what it can do, this video on the foundation website is a good place to start.


The Raspberry Pi foundation expects strong early demand from hobbyists, but the longer-term aim is to attract new users at school level. Since the Pi is to sell for about £20-£25 that looks realistic.

You can't pre-order the Pi, and should beware of sites offering the Pi: they are trying to part you from your money. You can help to test out the new on-line shop and contribute to this very worthwhile project by purchasing a Raspberry Pi sticker. You'll end up paying a little over £3, most of which will go to support the foundation.

If you want to use an ARM-based Linux board for robotics or test gear applications you are spoilt for choice at the moment. There's the Beagleboard, the mbed, the LPCxpresso, and the gumstix range. Soon there will be the BeagleBone and Rapsberry Pi. While their markets overlap a little, each board has its own unique advantages. Once I've got my hands on the BeagleBone and Pi I will attempt a feature-based comparison and post the results.

While you're waiting, do register at the Raspberry Pi site and buy a sticker!


Thursday, 10 November 2011

I2C links Arduino and Beagleboard - step 3

A lot of useful work today, and a valuable discovery, but I haven't quite got to where I want to be yet.

I'm trying to use an Atmel ATMega8 on a DT107 board from Dontronics as the middleman, sitting between the BeagleBoard and the LCD display I want to drive.

It took a while to wire up the DT107 to the LCD. To find out about what connects to what, I had to look at  the Oomlout instructions, an Arduino Pinout, the ATMega pinout, the DT107's schematic and the layout of the SimmBus.

I'm fairly sure I've got the connections correct but the Beagleboard is complaining about an error on the I2C bus. That part of the wiring is easy to check, so I think the probblem is more fundamental.

The DT107 board I'm using has an ATMega8 with an 8Mhz crystal. It just may not be able to run I2C at 400kHz, which is what the BeagleBoard I2C-2 interface uses.

On the plus side, I discovered that you can use the Arduino development environment with an ISP to program a sketch directly onto an AVR. So there's no need to install a bootloader! That simplifies things considerably. I'm using a USBTinyISP from adafruit; it's supported by AVRDude, which Arduino uses under the covers, and they work really well together.

The only gotcha to beware of is that the ISP puts 5v on the board's Vcc, so you need to be careful to isolate the DT107 board from the Beagleboard when programming the AVR.

Tomorrow I'll solder up another DT107 with a 16MHz crystal and an ATMega328. If I've got the wiring from board to LCD correct, we should be away to the races.

BeagleBoard drives LCD via I2C - step 2

The BeagleBoard can now drive an LCD display via I2C, using an Arduino as an I2C slave.

The Arduino sketch is a slightly tweaked merge of two examples: the LCD driver and the I2C slave.

I've written the BeagleBoard driver in Python. It's really simple.

It uses my generic I2C class, which is also very straightforward.

For now, here's the Python code for the LCD Driver.

#! /usr/bin/python
import i2c, time

FF = '\f' # Form Feed

class LCD:
 def __init__(self, address): 
  self.lcd = i2c.I2C_device(0x04)
  
 def pr(self, ch):
  self.lcd.begin_transmission()
  self.lcd.send(ord(ch))
  self.lcd.end_transmission()
  
 def prints(self, string):
  for ch in string:
   self.pr(ch)
   
 def clear(self):
  self.pr(FF)
   
lcd = LCD(4)
lcd.clear()
lcd.prints('Hi from BB')
time.sleep(2)
lcd.clear()
lcd.prints('Hello again')
It uses my generic I2C class, which is also very straightforward.

I'll put all the code up on GitHub real soon now.

Wednesday, 9 November 2011

I2C links Arduino and Beagleboard

I want to revise the design of my I2C-based LCD board. The old design works, but it's not reliable and it puts a lot of traffic on the I2C bus. I'd prefer something that created less traffic and placed fewer demands on the host.

I2C is a great protocol for connecting sensors to micro-computers, but you can also use it to link two  computers together.

The solution that I'm looking at will use an Atmel 8-bit AVR  processor to drive the LCD and act as an IC2 slave. That way the host computer needs to send just two bytes down the wire to write a character. The current design sends three or four times that many.

I'm going to develop the solution in small steps:
  1. Get the BeagleBoard talking to an Arduino over I2C with BB as master and Arduino as slave.
  2. Connect the Arduino to the LCD.
  3. Add LCD driver code to the Arduino sketch, and control it using I2C
  4. Put an ATMega8 in a DT104 board from Dontronics. I have several of each spare.
  5. Program an arduino bootloader into the ATMega8.
  6. Upload the I2C-LCD sketch to the ATMega8.
  7. Build a simple stripboard base for the LCD and the motherboard and connect them up.
Voilà!

Step one is done.

There's a handy I2C slave sketch among the Arduino examples, and a good tutorial showing how to connect two Arduinos on the main website. I've programmed the Arduino slave to sit on I2C address 4.

It's safe to connect the Arduino and the BB because tincantools' Trainer-xM board shifts the Beagle's 1.8v I2C signals to the 5v required by the Arduino and vice versa.

I found a useful blog post about using the Beagleboard I2c tools to drive another kind of device; it's easy to adapt the given command to talk to the Arduino.  When I type

i2cwrite 2 4 67
on the  Beagleboard, it sends a byte value of 67 on bus 2 to the device with I2C address 4 and the character 'C' (ascii decimal 67) is received by the Arduino.

Connecting the Arduino and the LCD

I expect that Step 2 will be the most time-consuming; patching together an Arduino an LDC is fiddly, but I've done it before and there are very clear instructions from Oomlout for the LCD that they supply.

Once that's done the rest should be fairly straightforward.

Bus Pirate to the rescue

Yesterday was frustrating but instructive. I started testing the radio link to TrackBot. At a minimum I want to create a dead man's handle to prevent the robot from careering into a wall. Some control over direction and speed would also be useful.


I'd set up an arrangement like this a few year back using a LEGO base and an AVR conrtoller. I kept the hardware but I was a bit lazy about project notes in those days. However, I knew that I'd been able to transmit commands from a Laptop to the AVR and I still have the receiver, the trnasmitter, and the hand-wired RSR232 cable and connector that I used to send sigmals from the Laptop.

I spent hours trying to get the arrangement working with Trackbot. I could detect when a character was being transmitted, but it wasn't being sent correctly. Usually this is a baud rate, frame length or parity issue, but not this time.

I checked and rechecked code and comms settings, but to no avail.

Time to try the Bus Pirate.

The Bus Pirate is an open-source troubleshooting tool which you can use to snoop or send messages in various protocols - I2C, SPI and Serial comms among others. I got mine from Proto-Pic along with its cables.

I linked it up to my receiver and confirmed thad data was not being received as expected. Each character was reported as having a framing error. I checked the transmitter where I saw the same problem.

Eventually I gave up, packed up for the evening, and had supper. Later that evening I had a flash of inspiration. What if the signal was inverted?

The Bus Pirate has an option to invert a serial comms signal; as soon as I turned it on, the framing errors disappeared and the Bus Pirate correctly reported the characters I was sending. A quick Google search, and I remembered what I had found out years ago: RS32 comms is active-low, but TTL comms is active-high. In other words, a 0-bit going down an RS232 cable is represented by +12v, and a 1-bit by -12V. TTL is not inverted; a TTL 0-bit is 0v but a 1-bit is +5V. Since one end of the link uses RS232 and the other uses TTL, every character gets garbled.

Last time round I fixed this by software. This time round I can simplify the transmitter circuitry and use an FTDI USB to TTL comms cable for the transmitter.  But not today - I am waiting for a replacement soldering iron stand. So it's time to do some more I2C development on the BeagleBoard.


Tuesday, 8 November 2011

Arduino on track

I've taken a break from the beagleboard and have been working on TrackBot - a tracked robotics prototyping platform.

The first iteration is complete; TrackBot now moves under program control.

It's running a simple test program which turns left, turns right, then moves forward and back, stops, turns a led on and then repeats the cycle. More ambitious behaviour can wait until I have a proximity sensor working; strip-board is fragile and I don't want TrackBot to break itself by running into furniture or a wall.

TrackBot is built from a Pololu RP5 base (now sadly discontinued by Pololu, but still available from Active Robots).

The base is controlled by a Solarbotics L298 compact motor driver; that in turn is controlled by an Arduino Pro Mini 328 (5v/16MHz).

The next iteration will be to link up radio control. I've already mounted an old 433.9 MHz radio receiver, but it's not yet connected to the Arduino.

After that I'll add proximity sensing (using IR and Ultrasonics), and a compass. That's probably about as far as I want to go with the Arduino Pro; the Arduino platform is great for quick, simple prototyping but  not so well suited to complex, concurrent processing.

The whole project is a first step towards B4 - the BeagleBoard based 'Bot. That will be based on the BeagleBoard xM or the recently-announced BeagleBone. It will probably contain an AVR as well, running some form of RTOS.