Posts

Showing posts with the label TensorFlow

Time to retire my Rapsberry Pi Tensorflow Docker project?

I need your advice! Six years ago I did some experiments using TensorFlow on the Raspberry Pi.   It takes hours to compile TensorFlow on the Pi, and when I started the Pi platform wasn't officially supported. Sam Abrahams found his way thorough the rather scary compilation process, and I used his wheel to build a Docker image for the Pi that contained TensorFlow and Jupyter. That made it easy for users to experiment by installing Docker and then running the image. I was a bit anxious, as that was my first docker project, but it proved very popular. Things have change a lot since then. For a while, the TensorFlow team offered official support for the Raspberry Pi, though that has now stopped. You can still download a wheel but it's very out-of-date. I recently discovered Leigh Johnson's post on how to install full TensorFlow on the Pi. It's slightly out-of-date but the instructions on how to compile it yourself probably still work. Most Pi-based AI projects now use Tens...

Docker build for TensorFlow 1.14 + Jupyter for Rasapbian Buster on Raspberry Pi 4B

Image
I've updated an old Docker build to create a Docker image for Raspberry Pi  Buster. It contains Katsuya Hyodo's TensorFlow wheel which has TensorFlow Lite enabled. The image contains Jupyter, so you can connect to the running image from anywhere on your network and run TensorFlow notebooks on the Pi. This is highly experimental - don't use it for anything important :) Once I've done some tidying up (and a lot more testing!) I'll put the image up pon DockerHub. To build/run it you need the Docker nightly build. I installed it by invoking curl -fsSL get.docker.com | CHANNEL=nightly sh If you find any problems please raise an issue on GitHub.  

Benchmarking process for TF-TRT, and a workaround for the Coral USB Accelerator

Image
A couple of days ago I published some benchmarking results running a TF-TRT model on the Pi and Jetson Nano. I said I'd write up the benchmarking process. You'll find the details below. The code I used is on GitHub . I've also managed to get a Coral USB Accelerator running with a Raspberry Pi 4. I encountered a minor problem, and I have explained my simple but very hacky workaround at the end of the post. TensorFlow and TF-TRT benchmarks Setup The process  was based on this excellent article , written by Chengwei Zhang . On my workstation I started by following Chengwei Zhang's recipe. I trained the model on my workstation using and then copied trt_graph.pb from my workstation to the Pi 4. On the Raspberry Pi 4 I used a virtual environment created with pipenv , and installed jupyter and pillow . I downloaded and installed this unofficial wheel . I tried to run step2.ipynb but encountered an import error. This turned out to be an old TensorFl...

Training ANNs on the Raspberry Pi 4 and Jetson Nano

Image
There have been several benchmarks published comparing performance of the Raspberry Pi and Jetson Nano. They suggest there is little to chose between them when running Deep Learning tasks. I'm sure the results have been accurately reported, but I found them surprising. Don't get me wrong. I love the Pi 4, and am very happy with the two I've been using. The Pi 4 is significantly faster than its predecessors, but... The Jetson Nano has a powerful GPU that's optimised for many of the operations used by Artificial Neural Networks (ANNs). I'd expect the Nano to significantly outperform the Pi running ANNs. How can this be? I think I've identified reasons for the surprising results. At least one benchmark appears to have tested the Nano in 5W power mode. I'm not 100% certain, as the author has not responded to several enquiries, but the article talks about the difficulty in finding a 4A USB supply. That suggests that the author is not entirely...

Getting Started with the Jetson Nano - part 4

Image
I'm amazed at how much the Nano can do on its own, but there are times when it needs some help. A frustrating problem... Some deep learning models are too large to train on the Nano. Others need so much data that training times on the Nano would be prohibitive. Today's post shows you one simple solution. ... and a simple solution In the previous tutorial , you went through five main steps to deploy the TensorFlow model: Get training data Define the model Train the model Test the model Use the model to classify unseen data Here's the key idea: you don't have to do all those steps on the same computer . Saving and Loading Keras Models   The Keras interface to TensorFlow makes it very easy to export a trained model to a file . That file contains information about the way the model is structured, and it also contains the weights which were set as the model learned from the training data. That's all you need to recreate a usable copy of th...

Getting started with the Jetson Nano - part 3

Image
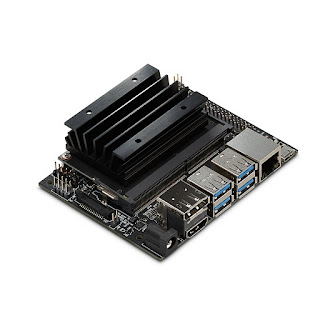
Jetson Nano image courtesy of NVIDIA/Pimoroni In part 2 of this series you prepared your Jetson Nano for software installation. In this part you'll install Jupyter Notebook, Jupyter lab, TensorFlow and some other software that is needed to run the first TensorFlow notebook. Once started, you can leave the software installation to run; it takes about an hour on a Nano in 10W power mode. It probably takes a little longer if you're using a 2.5A supply. There's a final manual stage which takes a couple of minutes. When that's complete you'll be able to work through the TensorFlow example, training a Neural Net to recognise item images from a Fashion database and then testing it in previously unseen images. Here's what you'll do, in a little more detail. Installing the software Open a terminal window on the Nano  (A short-cut,  crl-alt-T should do it). You'll be in your home directory; type git clone https://github.com/romilly/nano.g...

Getting Started with the Jetson Nano - Part 2

Image
Learning with the Nano This is the second in a series about getting started with the Jetson Nano. Part 1 is here . It's taken a while, but I now have a simple, repeatable set-up process for installing and running TensorFlow on the Jetson Nano using Jupyter Notebooks. It's simple and repeatable but slow . Jupyter Notebook saves a lot of time and angst once it's available but it takes a while to install. Fortunately I now have a script that automates the installation so you can go away and drink a coffee while the installation runs. Before you can install the software, though, you need to complete the installation of Ubuntu. That's what this post covers. My first post about the Nano described the hardware you need and pointed you to instructions that explain how to prepare your SD card. Once you've got your hardware and have prepared the SD card, it's time to fire up the Nano. Getting ready Plug in the HDMI cable, the Ethernet cable, the keyboa...