An I2C keypad for the micro:bit - part 2
 |
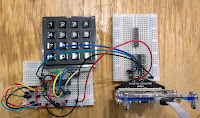
| A working prototype |
Preparing the Arduino clone was trickier than usual.
As I mentioned in yesterday's post, the Arduino needs to run at 3.3 volts. That's the working voltage (Vcc) for the micro:bit, the Pi and the Jetson Nano. Connecting I2C lines from a 5v device would damage them, so 3.3 v operation is essential.
I have a good stock of ATmega328P chips left over from the days when I was running Shrimping workshops. The ATmega328P works well at 3.3 volts, so long as the clock frequency is no more than 8 MHz. Most Arduinos run at 5v with a clock speed of 16 MHz, so there's work to do.
8 MHz clock issues
If I2C is to work reliably at 8 MHz the Arduino needs to be configured for an 8 MHz clock, and it needs a bootloader that works at that clock rate.
My first step was to wire up a working clone on a breadboard with an 8 MHz crystal and install the correct bootloader.
Installing the bootloader
These days it's pretty easy to burn a bootloader on an ATMega328. The Arduino IDE has a bootloader-burning sketch; I connected a Uno to my clone, following the excellent instructions on the Arduino website. I specified the target board as an Arduino pro mini with a 382 chip and 8 MHz clock and installed the bootloader.
Programming the Arduino clone
Once I'd done that I had a functioning, programmable clone running at 8 MHz on my breadboard. I wired it up to the keyboard and dug out a 3.3 volt FDTI cable.
Using the Arduino IDE and the FTDI cable I programmed my clone and did a smoke test to make sure that it was working. I'd modified the I2C keyboard sketch so that it flashed the on-board LED on start-up, and turned the LED on whenever the keyboard buffer filled up. I installed the sketch and verified that the keyboard was working.
Testing the keypad
Nearly there! I wrote a simple micropython test program for the micro:bit and connected it to the clone board. Using the mu REPL I could see the output from the keyboard. I've got the rows of the keyboard inverted, but that's easy to fix. The core is working and my next step will be to transfer the clone to an Adafruit perma-proto board, add a Grove connector, and document the whole construction and programming process. I've already added the Arduino and micro:python code to the babelboard software repository.
The micro:bit code
The microbit code is pretty simple.
from microbit import *
from time import sleep


class Keyboard:
    def __init__(self, addr=0x08):
        self._addr = addr

    def read_char(self):
        return i2c.read(self._addr, 1)


def run():
    kbd = Keyboard()
    while True:
        key = kbd.read_char()
        if (key != b'\x00'):
            print(key)
        sleep(0.01)

run()
I'll add comments and more code so you can use the keyboard with a Pi, an Adafruit CircuitPython board or a Jetson Nano.
Don't forget to follow @rareblog on Twitter if you want to see the final write-up!


Comments
Post a Comment