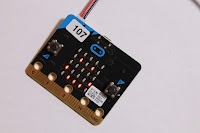
An I2C keypad for the micro:bit - part 1
 I love the micro:bit. It's affordable, it runs micropython, and it's instantly engaging. These days it's supported by a huge range of add-ons that extend its capabilities, but there's always room for more.
A lot of the add-ons that I buy or build use are based on the I2C protocol. I2C is a widely-supported way of connecting and controlling add-on boards to single board computers like the micro:bit, Arduino and Raspberry Pi.
There's lots of sample I2C code for the Arduino and the Pi, but not so much for the micro:bit. A few days ago I posted about an experiment connecting a micro:bit to a numeric keypad using I2C. That worked well, and the code is on GitHub. As you can see, the program needed quite a bit of code, and space on the micro:bit is at a premium. Since I wanted to add an LCD display I started looking for a more compact approach.
Help from Arduino
 I decided to try out a design that used a home-brew Arduino clone to scan the keypad and make key-presses available with a simple I2C interface.
I'd previously used Arduinos in I2C slave mode, and there's a great example in the Arduino docs. Next I found a keypad library that looked as if it would fit the bill. It handles 3x4 and 4x4 keypads and it deals with contact debouncing.
Since the client can look for a key-press at any time, and the user can press a key whenever they want, my code includes a ring buffer to store key-presses until they are asked for. I used code from this excellent article on Hackaday.
The Uno Protoype
 I put together a prototype using two Arduino Unos, one acting as a slave and one as the master.
It worked, and I've added the code and a fritzing diagram to the babelboard software project. It should be a simple matter to replace the slave Uno with a home-brew Arduino clone, but I've got one minor challenge to overcome.
The Uno runs on 5 volts, but the micro:bit and the Pi use 3.3 volt signals and 5 volt inputs will damage them. I'll need to run my Arduino clone on 3.3 volts. It's not hard, but causes a few complications. I'll describe them (and, I hope, the solutions) in the next blog post.
Follow me (@rareblg) on twitter if you want to catch the next exciting episode :)


Comments
Post a Comment