How to program a simple homebrew micro:bit-based Robot
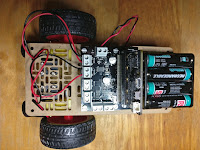
This afternoon I assembled a simple micro:bit mobile robot.
It uses the Kitronik motor driver board and some Adafruit motors.
I like the Kitronik board. It's easy to use, well documented, and the build quality is good.
I'll be making some minor mods over the next couple of days. It needs a ToF Lidar sensor to make sure it doesn't bump into things and I plan to power it from a phone charger battery with an additional on-off switch.
I'll use a second micro:bit to control it via radio.
Update! There are now four articles in this series, and the robot has been named. It's called Anastasia.
Here are the articles:
1. This introduction.
2. An short update when I released the initial code on GitHub.
3. A detailed walk-though of the controller code.
4. A detailed walk-through of the code that runs on the robot.
The test code I wrote to check the wiring was very simple.
In the longer term I'll replace the micro:bit with an Adafruit Clue and add some more intelligence.
It uses the Kitronik motor driver board and some Adafruit motors.
I like the Kitronik board. It's easy to use, well documented, and the build quality is good.
I'll be making some minor mods over the next couple of days. It needs a ToF Lidar sensor to make sure it doesn't bump into things and I plan to power it from a phone charger battery with an additional on-off switch.
I'll use a second micro:bit to control it via radio.
Update! There are now four articles in this series, and the robot has been named. It's called Anastasia.
Here are the articles:
1. This introduction.
2. An short update when I released the initial code on GitHub.
3. A detailed walk-though of the controller code.
4. A detailed walk-through of the code that runs on the robot.
Simple control code
The test code I wrote to check the wiring was very simple.
from microbit import *

left = (pin16, pin0)
right = (pin8, pin12)

forward = (0, 1)
backward = (1, 0)
coast = (0, 0)
brake = (1,1)

def set(side, direction):
    for i in range(2):
        side[i].write_digital(direction[i])
# wait for button A to start
while True:
    if button_a.is_pressed():
        sleep(10)
        break

set(left, forward)
set(right, forward)
sleep(2000)
set(left, brake)
set(right, brake)
sleep(500)
set(left, backward)
set(right, backward)
sleep(2000)
set(left, brake)
set(right, brake)
Clued up soon
In the longer term I'll replace the micro:bit with an Adafruit Clue and add some more intelligence.


Comments
Post a Comment