More fun with the Pimoroni Explorer HAT
 I've been playing a bit more with the new Pimoroni Explorer HAT.
One of the most exciting features of the Pro version is the analogue interface.
Once you've installed the ExplorerHAT package using pip, you can try typing in the examples in the README on github.
If you want some more examples, you can clone the github repository into a directory of your choice. Then you'll be able to run the code from the examples directory. Type
git clone https://github.com/pimoroni/explorer-hat.git
cd explorer-hat
sudo python examples/analog-event.py
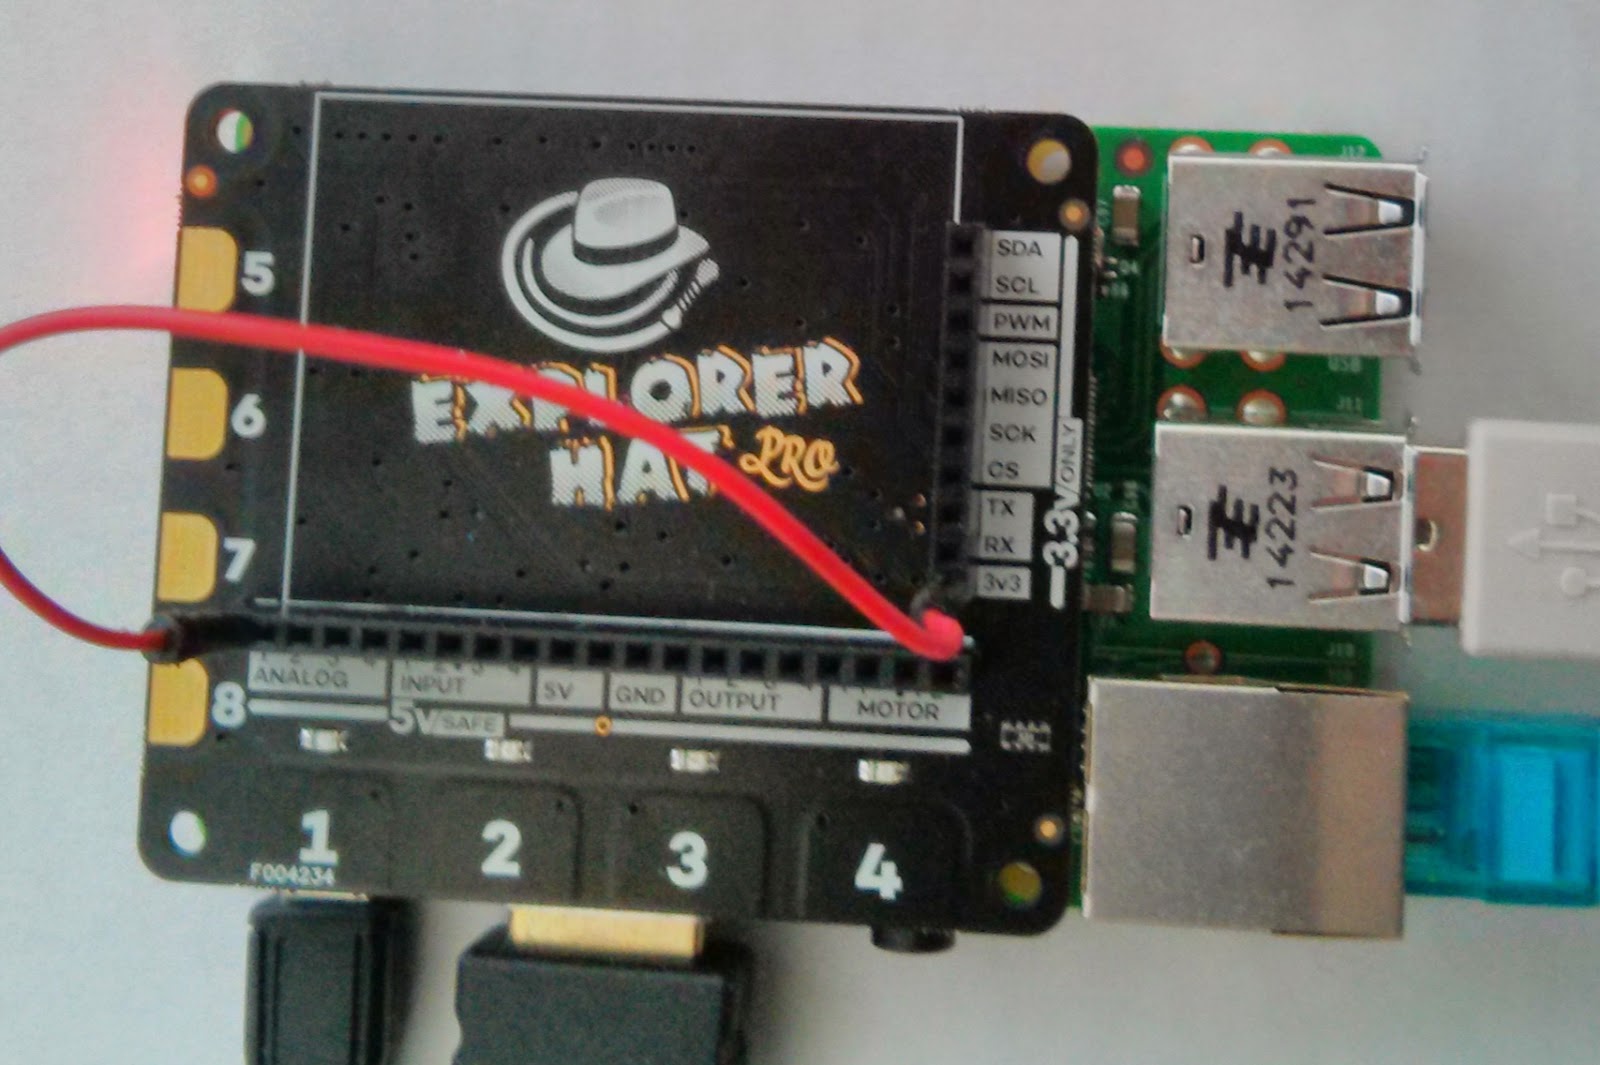
You'll see a series of rapidly varying numbers displayed in the console. These show the current voltage as seen on analogue input 1. Since you (presumably) haven't connected that to anything, the output will be fluctuating random values.
To see something more sensible, use a jump wire to connect analogue input 1 to the Hat's 3.3 volt output, and you should see the display stabilize showing a value of about 3.3

I'm really excited by the Explorer HAT. I will blog some more about it as I play, and I am going to use the blog posts as the basis of an inexpensive Experimenter's e-book. If you might be interested, sign up here and I'll let you know when the book is available.


Comments
Post a Comment