Posts

Getting started with the Jetson Nano - part 3

Image
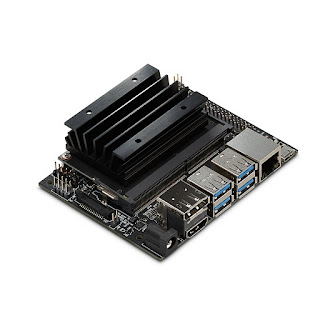
Jetson Nano image courtesy of NVIDIA/Pimoroni In part 2 of this series you prepared your Jetson Nano for software installation. In this part you'll install Jupyter Notebook, Jupyter lab, TensorFlow and some other software that is needed to run the first TensorFlow notebook. Once started, you can leave the software installation to run; it takes about an hour on a Nano in 10W power mode. It probably takes a little longer if you're using a 2.5A supply. There's a final manual stage which takes a couple of minutes. When that's complete you'll be able to work through the TensorFlow example, training a Neural Net to recognise item images from a Fashion database and then testing it in previously unseen images. Here's what you'll do, in a little more detail. Installing the software Open a terminal window on the Nano  (A short-cut,  crl-alt-T should do it). You'll be in your home directory; type git clone https://github.com/romilly/nano.g...

Getting Started with the Jetson Nano - Part 2

Image
Learning with the Nano This is the second in a series about getting started with the Jetson Nano. Part 1 is here . It's taken a while, but I now have a simple, repeatable set-up process for installing and running TensorFlow on the Jetson Nano using Jupyter Notebooks. It's simple and repeatable but slow . Jupyter Notebook saves a lot of time and angst once it's available but it takes a while to install. Fortunately I now have a script that automates the installation so you can go away and drink a coffee while the installation runs. Before you can install the software, though, you need to complete the installation of Ubuntu. That's what this post covers. My first post about the Nano described the hardware you need and pointed you to instructions that explain how to prepare your SD card. Once you've got your hardware and have prepared the SD card, it's time to fire up the Nano. Getting ready Plug in the HDMI cable, the Ethernet cable, the keyboa...

Getting Started with the Jetson Nano

Image
Note: The approach outlined in this series will still work, but there is an interesting official alternative. The Jetson team at NVIDIA have created an excellent self-study course , supported by a downloadable image which is similar to the one used in these articles. To use the NVIDIA image, you'll need: Jetson Nano Developer Kit Computer with Internet Access and SD card port microSD Memory Card (32GB UHS-I minimum) USB cable (Micro-B to Type-A) If you just want to use the course image, you can get by with those items and a 5V 2.5A power supply but to take the course you will need compatible 5V 4A Power Supply with 2.1mm DC barrel connector 2-pin jumper compatible camera such as Logitech C270 Webcam or Raspberry Pi Camera Module v2 You will not need a monitor, mouse or keyboard . To learn where to find the DLI course image, and how to get started with it, you should enroll on the course . It's free, takes about 8 hours, and will give you an excellent ...

Three reasons to love guizero

Image
I'm working on a Quiz runner project for my forthcoming book on the micro:bit. The first version worked, but it was much too complicated and very hard to test. After weeks of frustration I decided to go back to the drawing board and try a different approach. The current design is shaping up well. It uses a conventional computer as well as micro-bits, and the program that runs on the big computer needs a Gui. The micro:bit connected to the computer acts as a radio receiver; the micro:bits for each team transmit a signal when the team wants to answer a question. The person running the quiz sees that a team is buzzed and asks them for their answer. Then they tell the program whether the answer is right or wrong so the computer can keep score. The program on the computer needs a Gui. I've played with @codeboom 's guizero before, and liked it, so I decided to use it for the project. It's turned out to be an excellent choice, for several reasons: guizero h...

A concise solution to a fiddly coding problem

Image
I My pomodoro timer is coming on nicely. I'll post about progress in the next day or so. For now, here is a short story about a problem I hit while working on the project, and the happy solution that I came up with. For some time I've kept an online journal for each project I'm working on. Like some blogs, the journals used to have the latest entries at the top. Here's a sample journal file: # Project journal for zero-web ## Thursday 07 February 2019 I added 2 new pages. ## Monday 04 February 2019 I've created a homepage. I'll serve it with websocketd. I found that order confusing. I decided that I'd prefer the posts ordered as they would be in a paper diary, with the latest posts last. That way I could read the  project history like a book. The problem: I have a lot of project journals, and I really didn't want to edit them all by hand. I decided to write a program to do it. The problem was simple to solve using APL. Regul...

Pomodoro timer with ToF sensor in CircuitPython

Image
Yesterday I started working on a fun application using a time of flight sensor. It looks as if it's going to solve a problem I've had for years. Like many of my friends I use P omodoro time management when I'm writing or coding. The Pomodoro technique uses a timer to you to get up and take a five minute break after 25 minutes at the keyboard. This helps you focus during the 25 minutes of work and the break keeps you healthy and fresh. The original Italian creator used a kitchen timer shaped like a tomato - hence the name. I don't have a suitable kitchen timer so I use a web browser to access http://e.ggtimer.com/pomodoro . That works well if I remember to start the timer whenever I sit down to write or code, and to restart it if I am interrupted. Often I forget, and that's annoying. A while ago I came up with the idea of automating the Pomodoro. My first idea used a pressure sensitive cushion on my study chair. I had some fun wit...

Early computing in Britain

Yesterday I spent a fascinating afternoon at a BCS Computer Conservation Society meeting, listening to Professor Simon Lavington's outstanding talk on Early Computing in Britain. Simon described the genesis of  Feranti's Mark I and I* computers and their early history in the late 1940s and early 1950s. This was a seminal period in the history of computing. I was just too young to experience it, but the first two computers I programmed were Ferranti Machines. Back in 1958, as an 11-year old, I wrote a short program in Pegasus Autocode; I finally debugged it a few years ago! Some years later, in 1966, I was lucky enough to get a gap year job working for David Hendry on the BCL compiler for Atlas , then the most powerful computer in the world. I knew very little about the Ferranti Mark I which was the predecessor of the Pegasus. Like all electronic computers of those early days the Mark I used valves (vacuum tubes) which were prone to failure when their filaments broke. ...