Review: Get started with MicroPython on Raspberry Pi Pico
If you want to explore the Raspberry Pi Pico you'll find it really easy to get started.
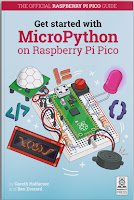
On the day of the announcement the Raspberry Pi Foundation released excellent documentation.The Raspberry Pi press also published a great starter guide: Get started with MicroPython on Raspberry Pi Pico.
It's a super book. The authors are professional journalists and experienced Pi enthusiasts, and it shows!The book covers everything a beginner needs to know to start exploring Physical Computing with the Pico.
A guided tour of the Pico
Chapter 1 starts with a guided tour of the board.
Next it explains how to solder the headers you'll need if you want to use the Pico with a breadboard. The soldering instructions are clear enough for a novice to follow. The book wisely warns younger users to make sure they are supervised by an adult. It's easy to burn yourself badly with a hot iron while you're learning.
The chapter finishes with clear instructions that tell you how to install MicroPython on the Pico.
Chapter 2: Hello Pico World!
Chapter 2 gets you running your first programs.
The book recommends using the Thonny IDE. As I mentioned in yesterday's blog post, I hit a minor snag with Thonny; it claims to run under Python 3.5, but it won't, as it uses language features that version 3.5 won't support. That's not a problem if you are using a Raspberry Pi with current software.
You will need to make sure that the version of Thonny is up to date (3.3.3 or later). I had to upgrade the software on my Pi to get access to the MicroPython (Rapsberry Pi Pico) option.
You'll probably find the first couple of program rather familiar.
The first is a minimalist version of Hello World.Since Thonny includes a REPL, you can enter print("Hello, World!") and see an immediate response.
After introducing the idea of looping in Python, and exploring conditional statements, the book moves on to Physical computing: connecting your Pico to the surrounding world using electronic components.
Chapter 3: A whirlwind tour of electronics
You'll find out about all the Pico's GPIO pins and what you can do with them. Old hands will be delighted to discover that the Pico can read analogue signals. Three of its pins are connected to 12-bit ADC channels, so you can measure up to three voltages. Chapter 3 also explains how to use a breadboard with jump wires, and introduces a range of electronic components:
- push buttons
- LEDs
- Resistors
- Buzzers
- Potentiometers
- PIR sensors and
- I2C LCD Screens.
Chapter 4: blinkenlights at last!
Chapter 4 ups the pace. You'll learn about connecting components to the Pico and controlling them using MicroPython. The very first program needs no extra components, since the Pico has an onboard LED.
Chapters 5-9
Chapters 5 to 9 walk you through a series of projects that will introduce you to many of the capabilities of the Pico:
- Traffic Light Controller
- Reaction Game
- Burglar Alarm
- Temperature Gauge
- Data logger
Chapter 10: I2C and SPI
 |
| Image courtesy of Pimoroni |
Pico PIO - an end to bit-banging!
The book concludes with three appendices. Appendix A covers the Pico specification. Appendix B covers the Pico pinout. Appendix C - the last one - covers one of the most exciting features of the Pico - PIO.
As well as its dual-core Arm CPU the Pico has eight tiny PIO computers than you can program and use to control GPIO pins. Not everyone will need them, but they have lots of interesting potential. If you need to use a protocol that's not already supported you have two options.
You can write code to do it, using the main CPU. That's known as bit-banging, and it suffers from a couple of problems; it needs quite a bit of processing power, and it's prone to timing errors.
Your second option uses those extra PIO processors.
Appendix C gives you a quick guided tour with examples to try and then adapt. I'm hoping to use PIOs to implement a couple of useful protocols: Dallas Semiconductor's one-wire protocol, and the DMX protocol used in theatres and discos to control lighting systems. I'll report in due course!
Summary
I love this book. It's clear, beginner-friendly, and beautifully illustrated.
At £10 it's not expensive, and the profit will help the Raspberry Pi foundation in its work. If you really can't afford a printed copy you can download a free pdf version. I have both.
If you're getting a Pico, or wondering whether to, start by getting this book!
I've lots more to share as I explore the Pico. Follow @rareblog on twitter to keep up to date!


Thanks! Very helpful.
ReplyDelete